

Although Credit Hound performs automated chasing of your customers using Collection Paths, there are times you will want to email a customer directly. By sending the email using Credit Hound, the activity will be recorded against the customer and you will be able to track when the email was delivered and read.
Benefits of Emailing Through Credit Hound
- You can select the transactions you want automatically referenced in the email
- Access to predefined email templates
- The email is logged against the customer and the relevant transactions as an activity
- Track when the email is delivered and read by the customer
 Example of sending a manual email using Credit Hound
Step-by-step Guide
- Open up the Customer that you want to email. You can find them from the Customer List
- In the Transaction list, tick the transactions that you want to include in the email.
- Click the Send Email button. This will open up the email dialog.
- By default the To field will be populated by the default contact. You can change these this by:
- Delete any recipients by clicking the X icon next to them.
- Add new recipients by typing out the contact name - a list of filtered contacts will be displayed.
- Add new recipients by typing in the email address.
- If you want to use a predefined template, you can selected one from the Template drop-down box.
- You can edit the Subject field, which may already have been populated by the template.
- Edit the email text. See below for more details on formatting the email.
- You can insert custom fields from the Custom Fields drop-down box. This will insert the selected custom field at the text cursors current location. See Custom Fields for more information.
- You can see how the email will look before you send it by clicking Preview. This displays the email and the custom fields as the recipient would see it. Click on Compose to return back to the editor.
- Click Send to deliver the email, or Cancel if you no longer wish to email the customer.
- A blue notification bar will appear along the bottom of the screen once the email has been sent.
Formatting Options
The email editor has a number of formatting options which allow you to change the colour of the text, use underline/bold/italic etc. See Email Editor Formatting for more information.
Email Signature
If you have set an Email Signature in My Settings, when clicking Send Email, your personal signature will be input automatically. The cursor appears before the email signature so you can continue to type the content of your email.
 If you select a Template, the current content will be cleared. However, you can use the Add Signature button in the editor menu to re-insert your signature into your manual email.
File Attachments
If you have additional documents to send to your customer along with the manual email, you can attach files from your computer by clicking on the Upload File icon on the email editor toolbar.
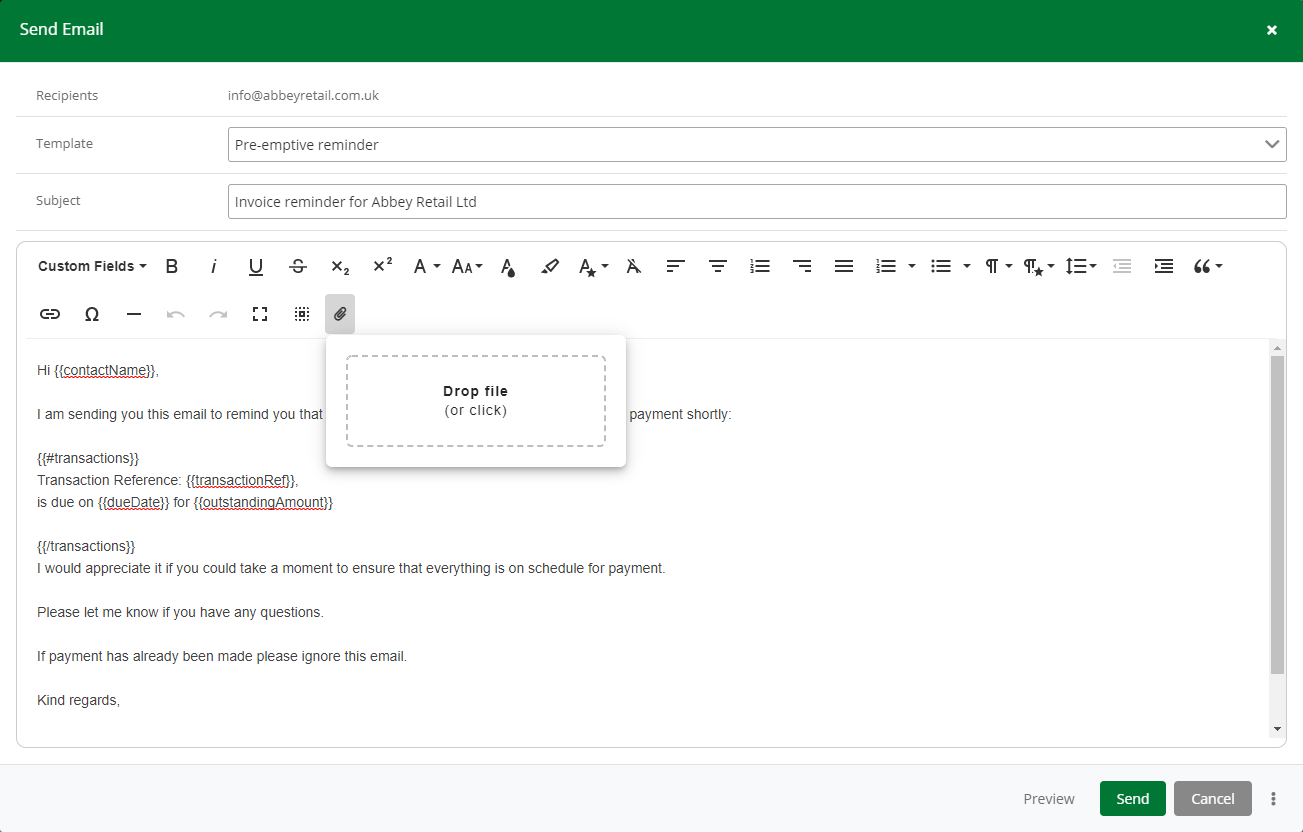
A pop-up selection area will appear which allows you to either drag and drop files from your computer onto the area or click the area to open a dialog where you can select the files that you would like to attach. You can also attach multiple files at once.
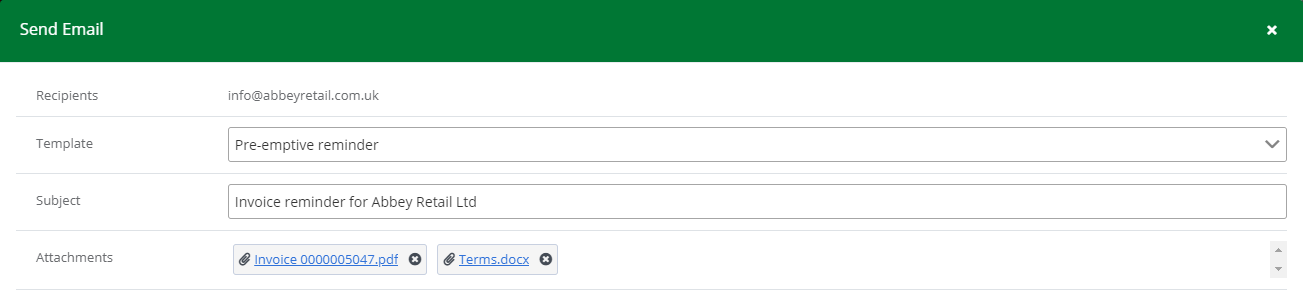 Attached Files
When your files have been attached, they will show in the Send Email dialog in the Attachments section. To ensure you have attached the correct files, you can click on the filename in the blue hyperlink to download the attachment to your computer. You can also delete any attached file by clicking the 'X' icon next to the file name.
There are certain restrictions that prevent an email from being sent. These include:
- If the number of files that you try to attach is greater than 20 files.
- If the combined size of the attached files (or a single file) exceeds 10MB.
- If you try to attach a folder. Try attaching a zip of the folder instead.
- If you try to attach a file with one of the following file extensions (not permitted for security reasons):
- '.ade', '.adp', '.apk', '.appx', '.appxbundle', '.bat', '.cab', '.chm', '.cmd', '.com', '.cpl', '.dll', '.dmg', '.ex', '.ex_', '.exe', '.hta', '.ins', '.isp', '.iso', '.jar', '.js', '.jse', '.lib', '.lnk', '.mde', '.msc', '.msi', '.msix', '.msixbundle', '.msp', '.mst', '.nsh', '.pif', '.ps1', '.scr', '.sct', '.shb', '.sys', '.vb', '.vbe', '.vbs', '.vxd', '.wsc', '.wsf', '.wsh'
Tracking Sent Emails
Outgoing emails have a Status field which can be viewed in the Activity panel.
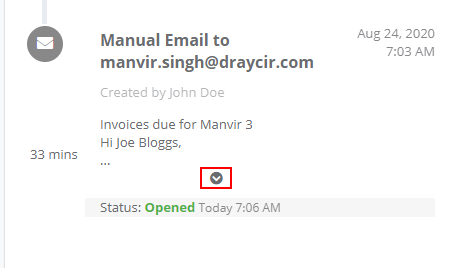 Activity panel - View Sent Email
You can click on the arrow on the email item in the Activity panel (highlighted in the screen above) to open the Sent Email window and view more details about the outgoing email.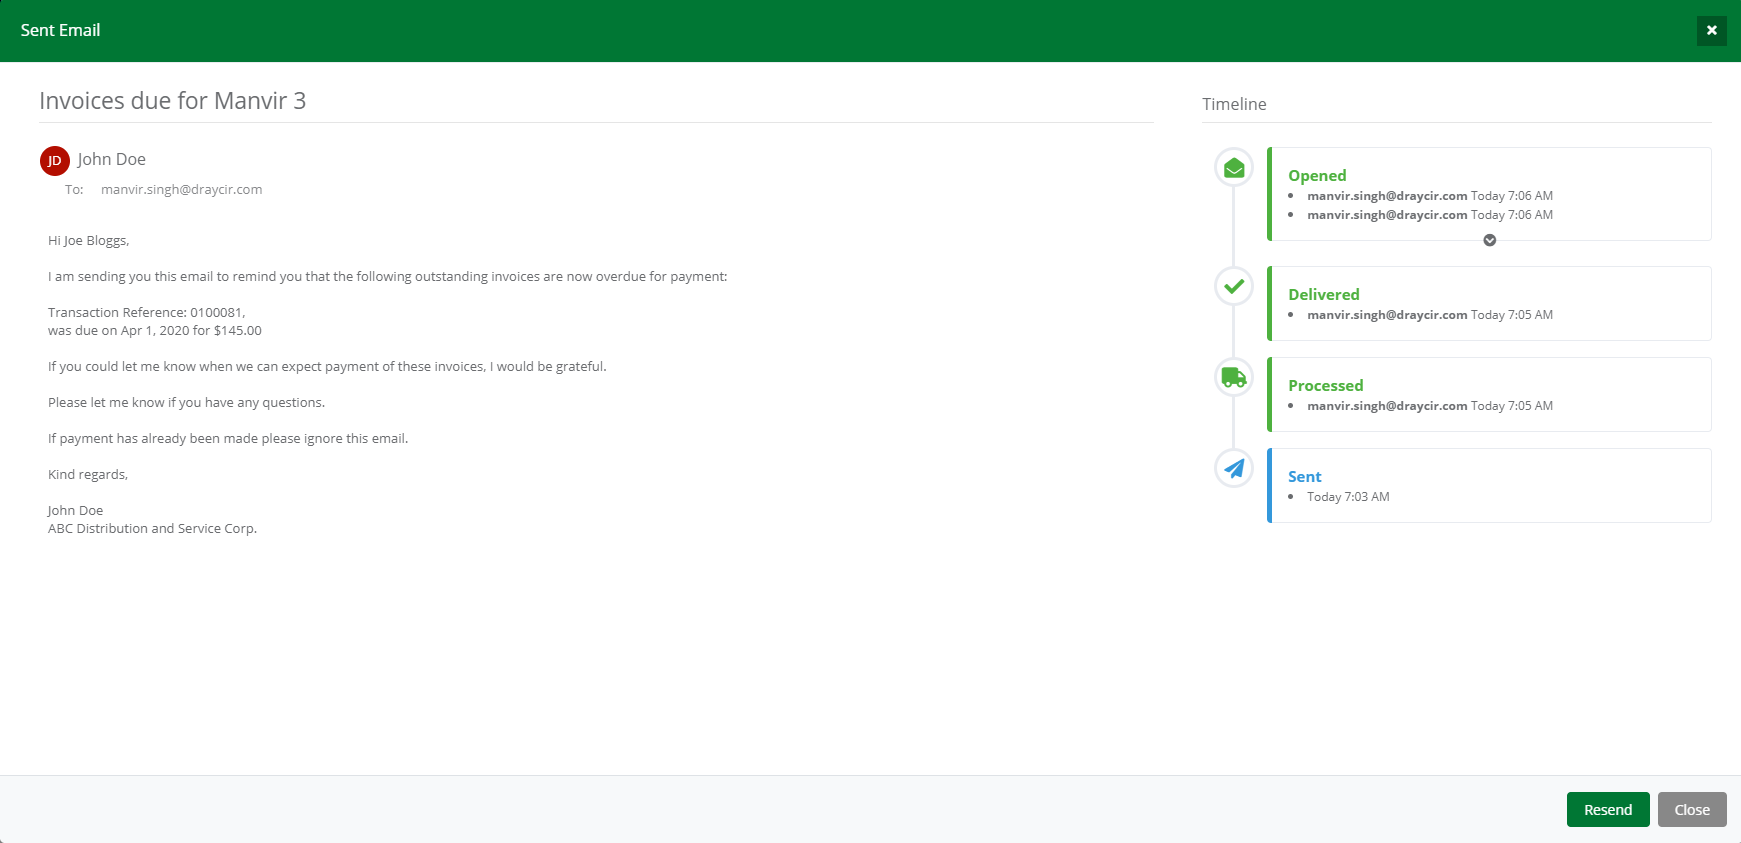 'Sent Email' window showing email details and its Timeline
The Timeline displays the journey that the email has been through as well as the recipient's interaction with the email, once it has been received by the customer. See Email Statuses for more information about the various statuses that Credit Hound reports back.