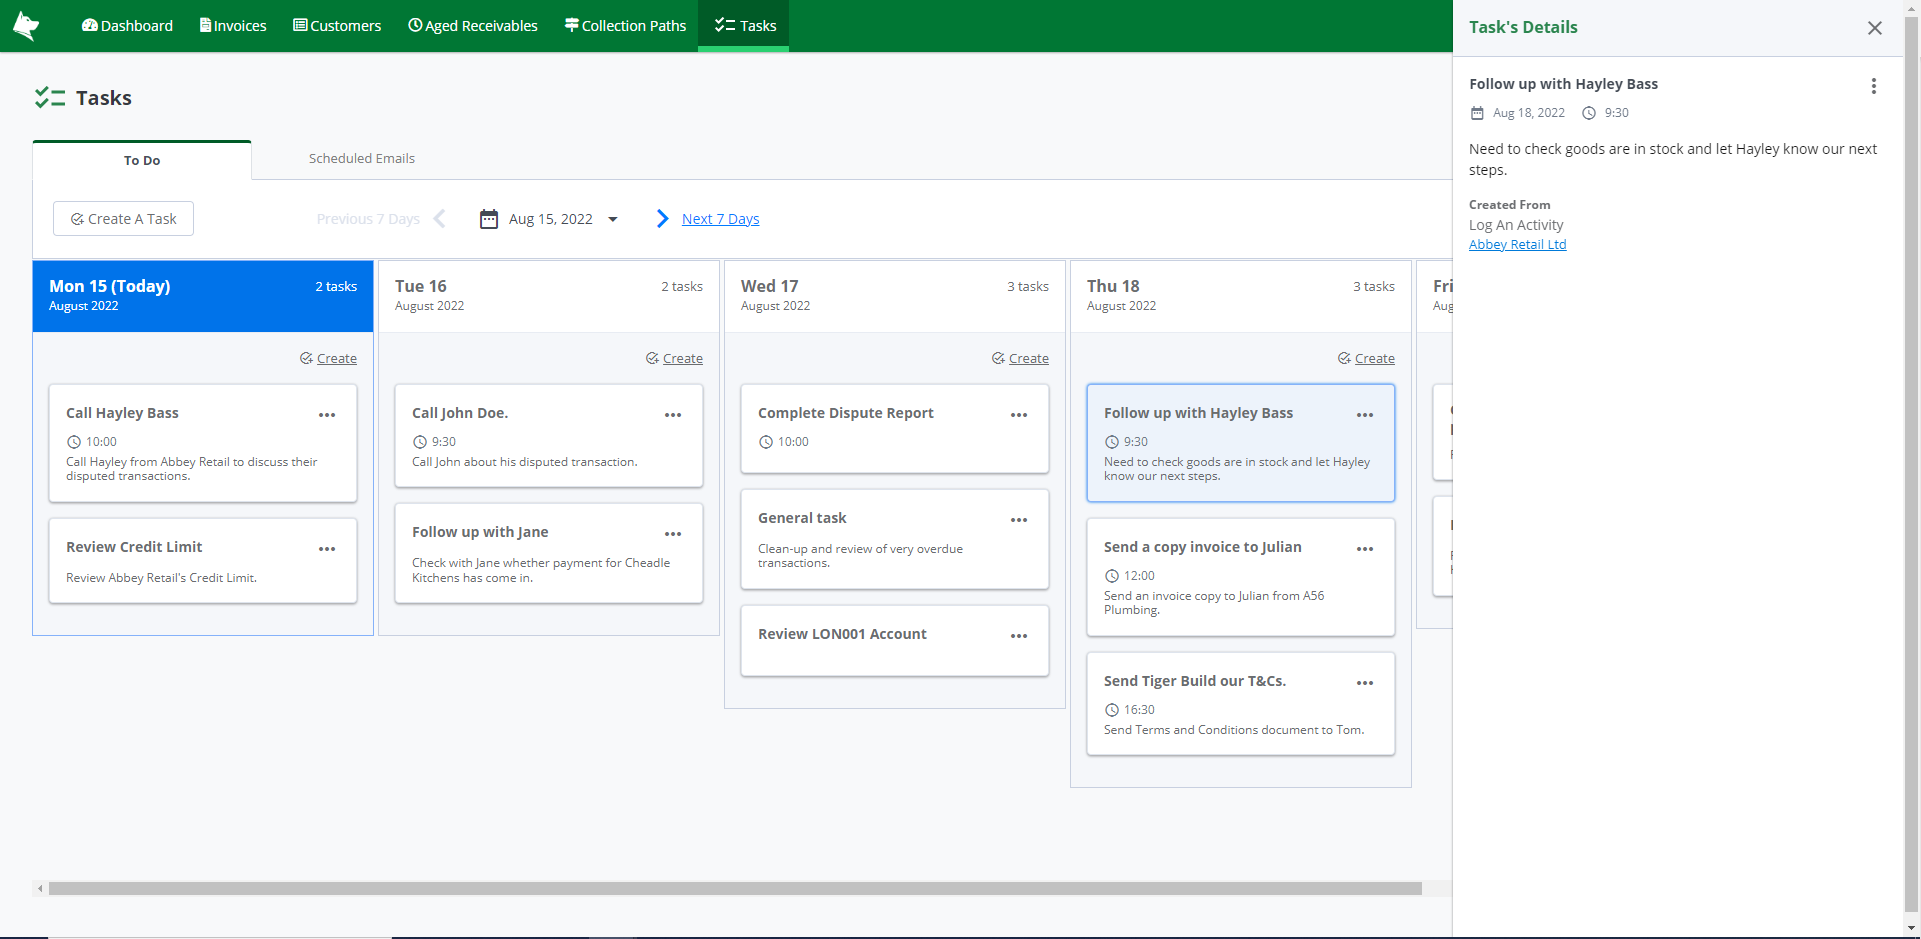
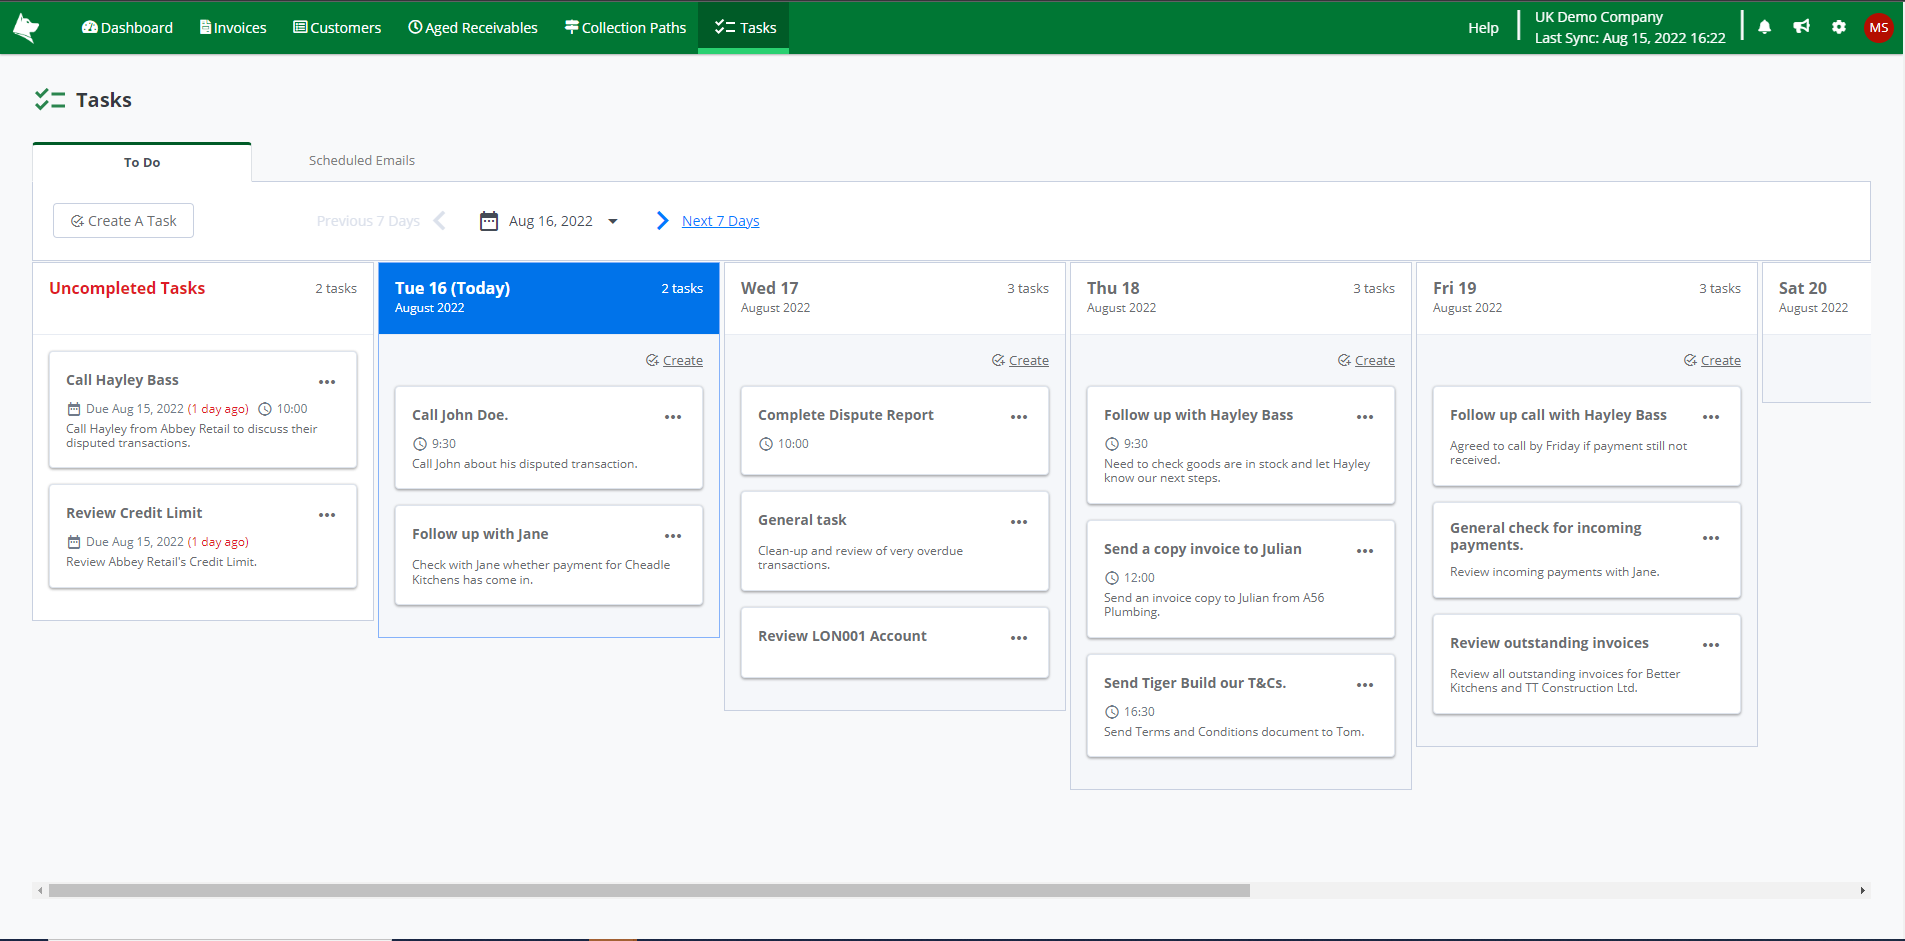
You can keep track of your own tasks by navigating to the To Do area under Tasks. Here you can view the upcoming week of tasks' and their date (and time). This allows you to see when when you have scheduled follow ups with customers, to chase for outstanding debt.
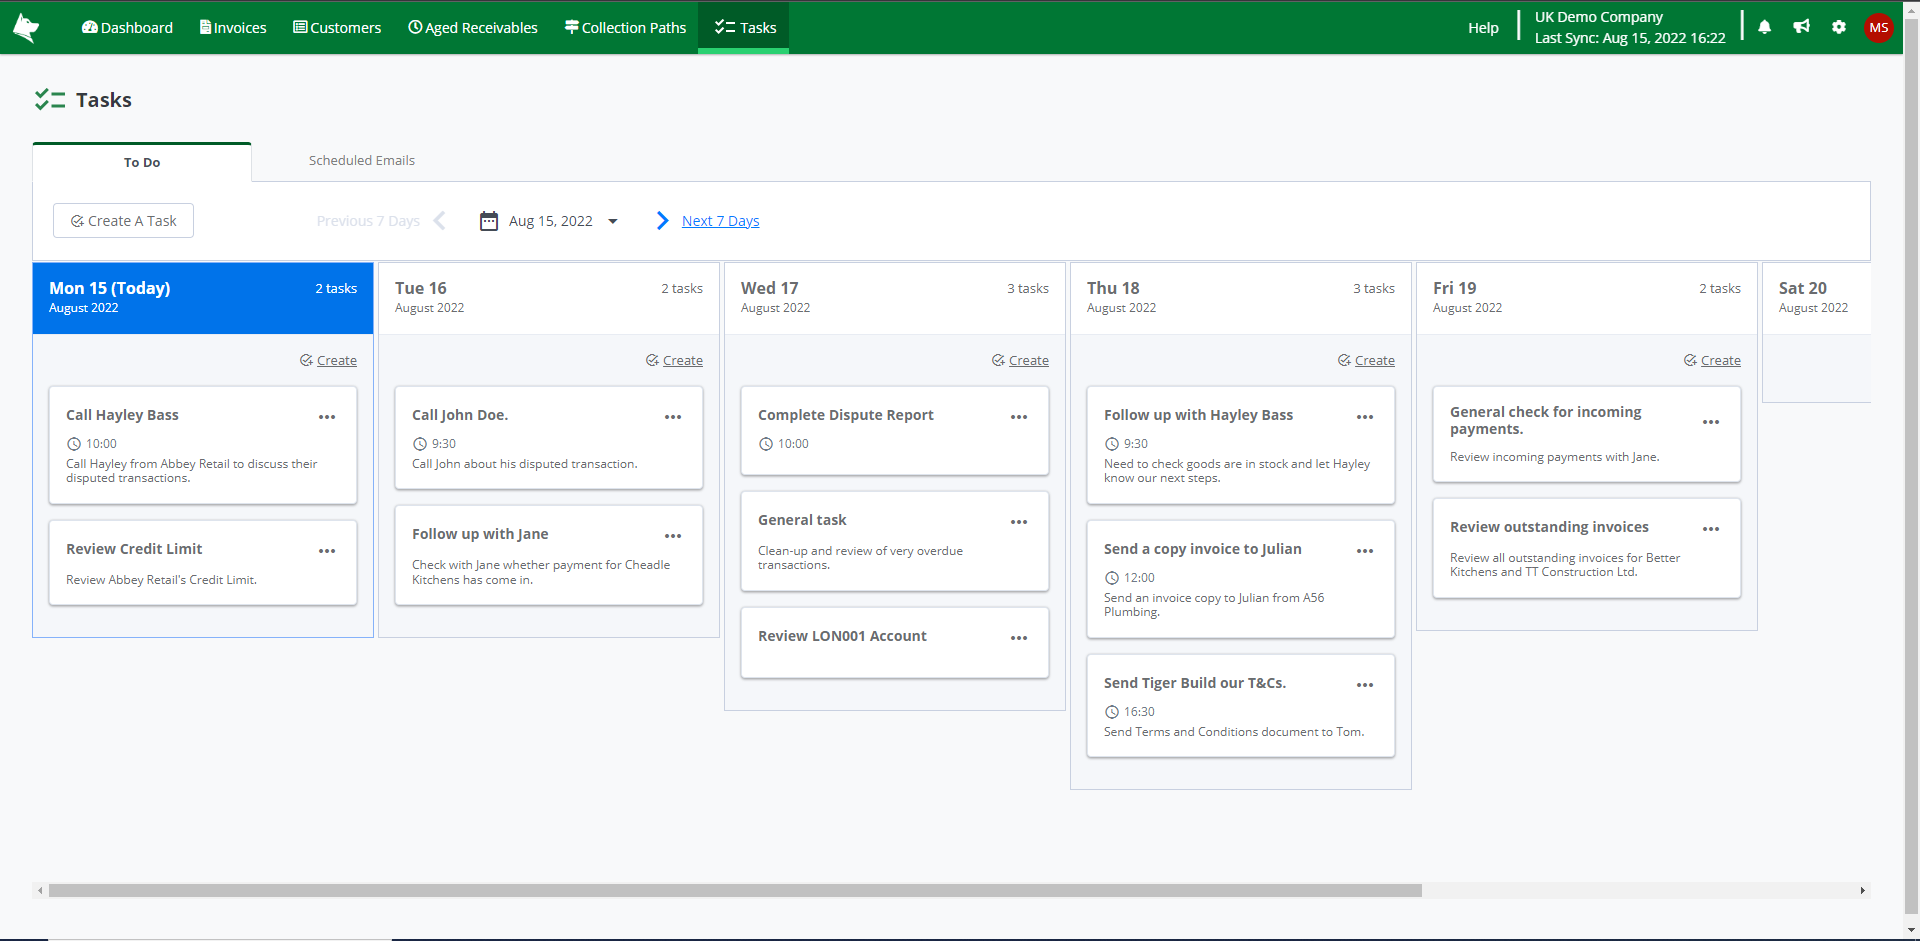 Tasks - To Do
Click on today's date at in the header to select the range days that you would like to see the tasks for.
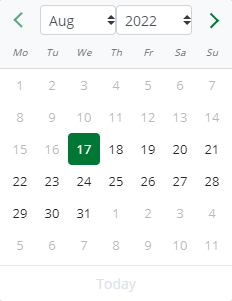
This will bring up a date picker from which you can select which date to start the 7 days from. You can also toggle through the Next 7 Days and the Previous 7 Days by clicking on the respective links.
The heading for Today is in blue to emphasise the tasks you can concentrate on working on today. There is also a count of the number of tasks for each day which helps provide you with a quick summary of the amount of tasks you need to get through.
View a Task's Details
You can view the details of a task by clicking onto any area of the task card itself.
The task's details will appear on the right hand panel.
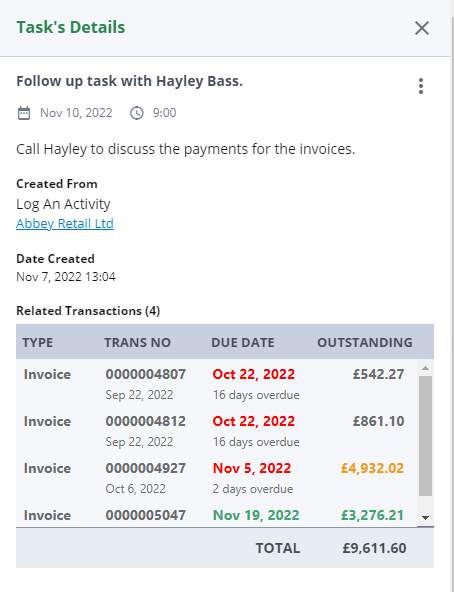
If the task was created from the Log An Activity process, this will show under the task details below Created From. You can click on the link on the customer's name to navigate to the Customer Screen. If any transactions were selected as part of the Log An Activity process, you can see the details of these related transactions here also.
See Create Tasks for guidance on how to create a task from Log An Activity.
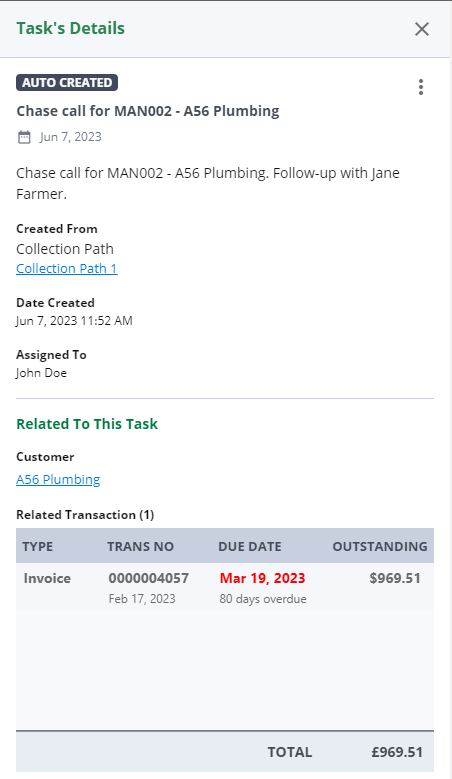
If the task was created from a Collection Path this will show under the task details below Created From. You can click on the link on the customer's name to navigate to the Customer Screen. You can see the details of the related invoices which were associated to the Collection Path action here also.
See Configure a Collection Path for details on how to create tasks from Collection Paths.
Uncompleted Tasks
If you have not completed a task today, the task will fall into the Uncompleted Tasks column.
 Uncompleted Tasks
Uncompleted Tasks appear as the first column. The column will show you a list of all tasks that have not been completed, along with the number of days the task has been outstanding.
Completing a Task
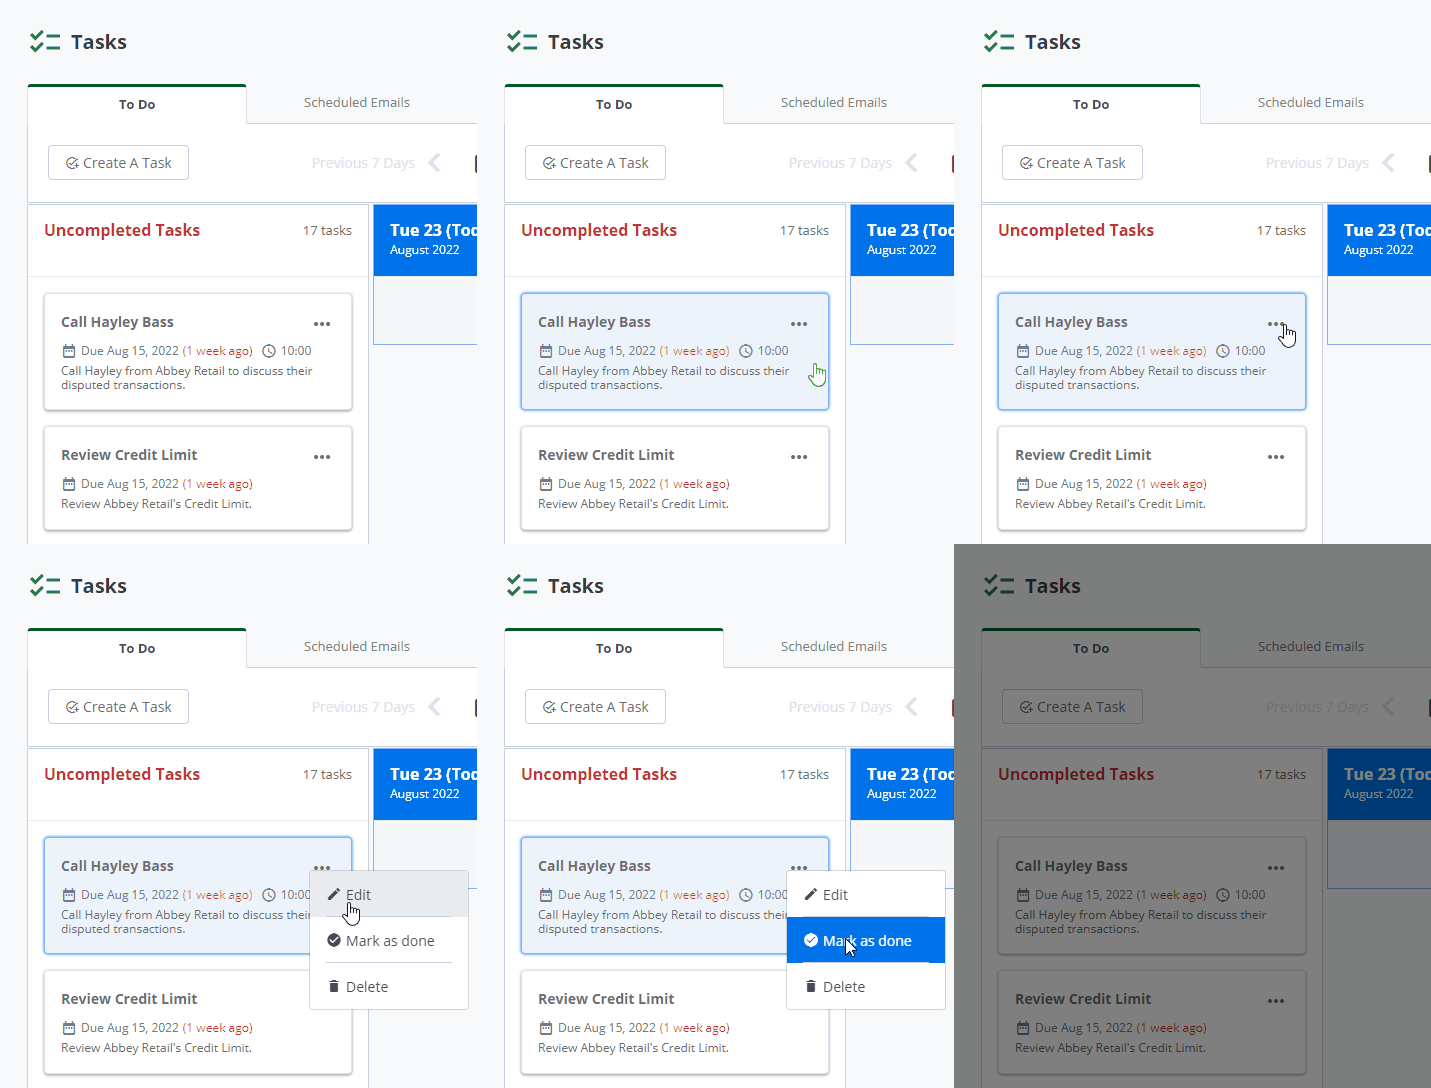
Completing a task can be done simply by clicking on the three dots next to the task header, selecting Mark as done and confirming this action.
You can also complete a task by viewing the task's details and performing the same steps in the panel on the right-hand side.
Deleting a Task
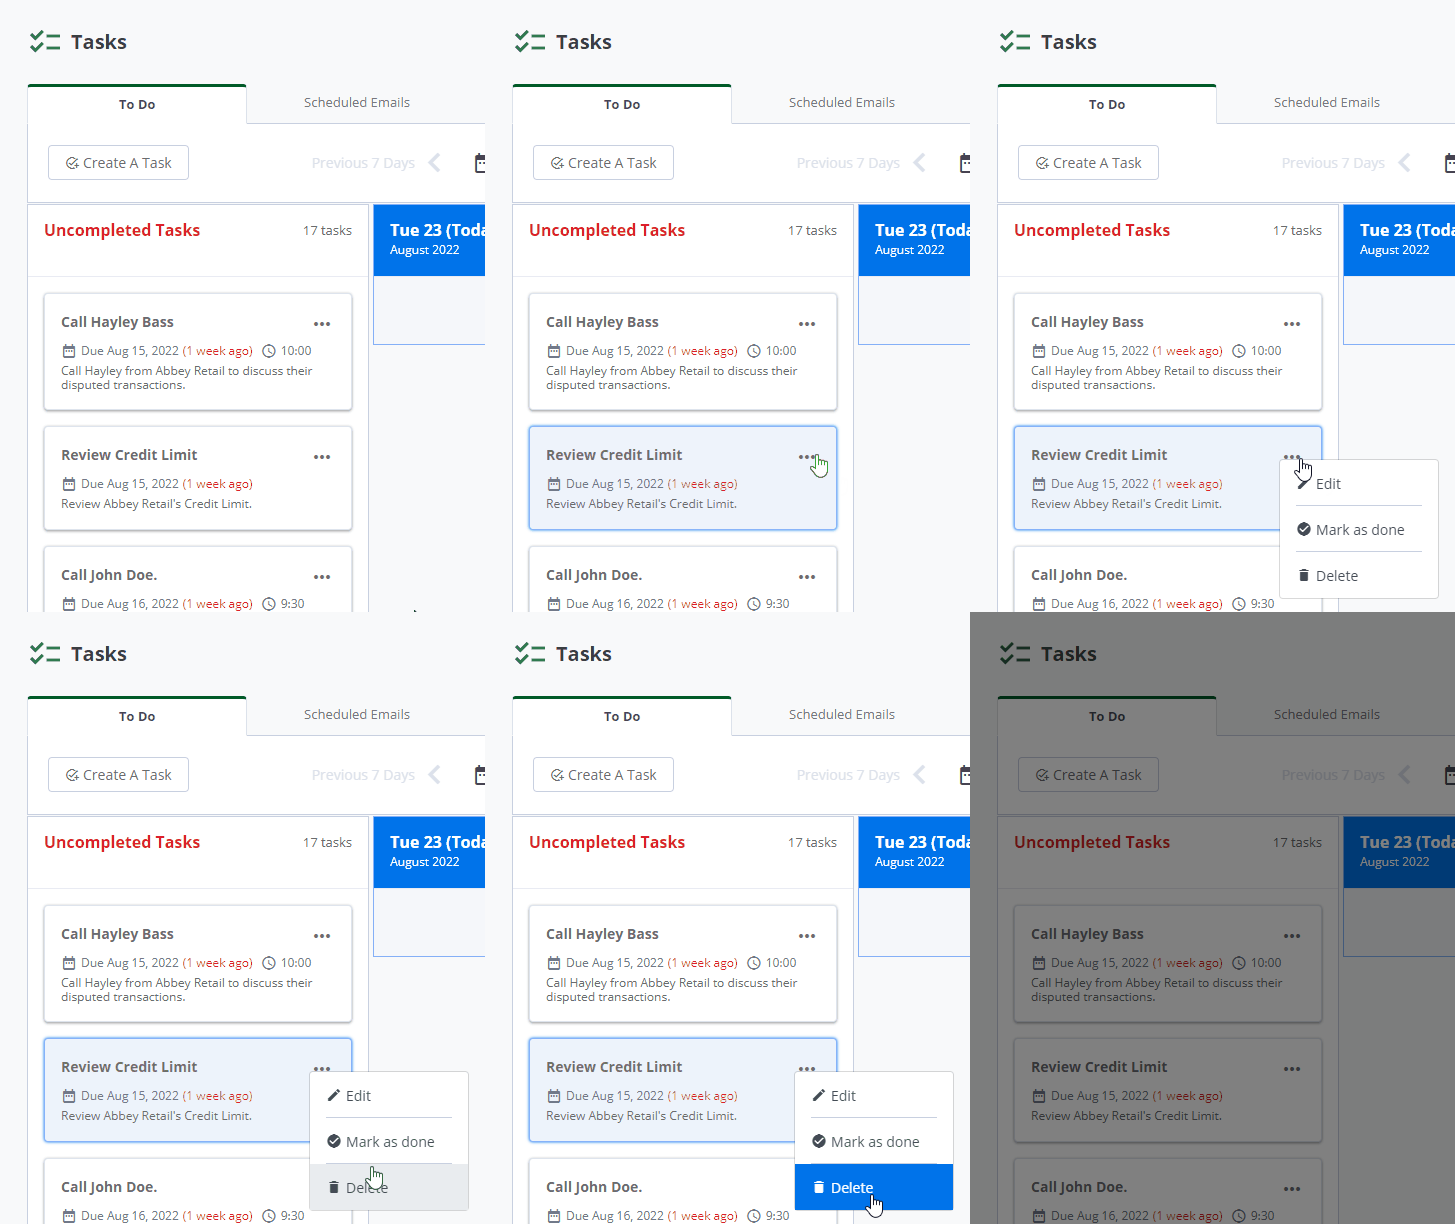
If you want to remove a task from your to-do's without completing it, click on the three dots next to the task header, select Delete. and confirm this action.
You can also remove a task by viewing the task's details and performing the same steps in the panel on the right-hand side.
Editing a Task
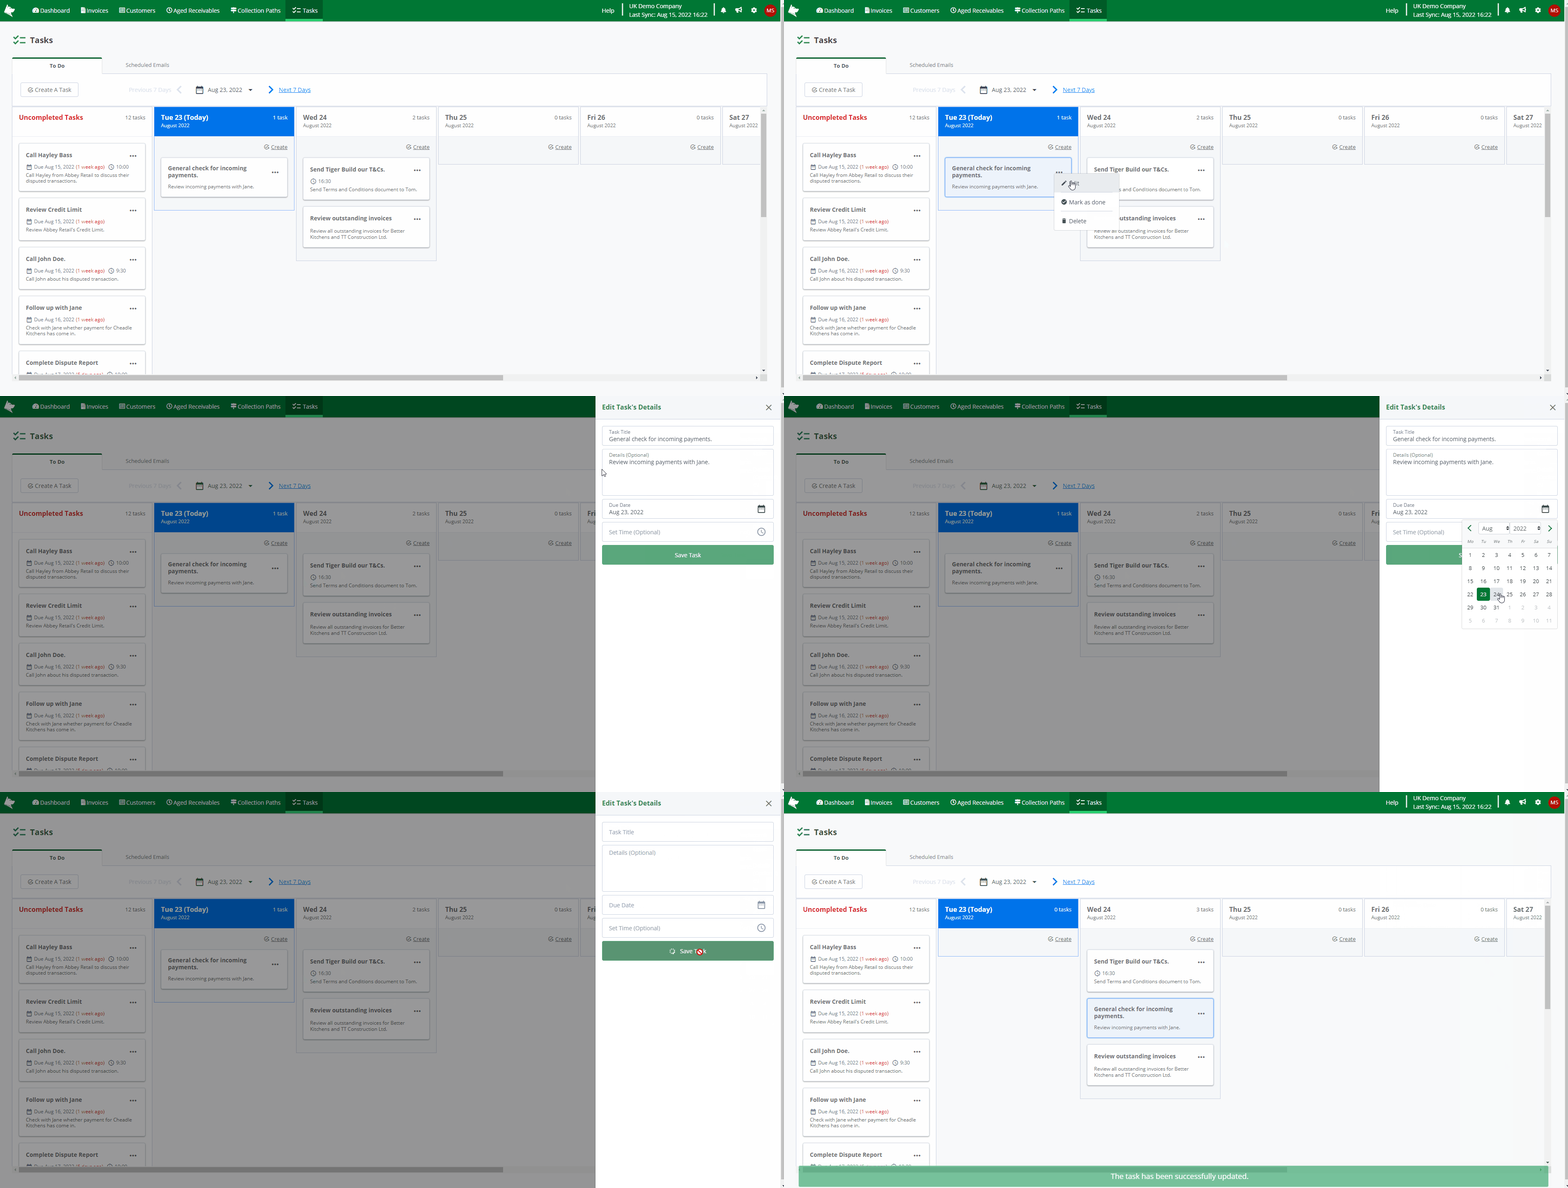
To edit a task, click on the three dots next to the task header and select Edit. From the panel that appears, you can update the details of the task and click Save.
You can also edit a task by clicking the task to view its details and then performing the same steps in the panel on the right-hand side.
How Are Tasks Sorted?
When you’re looking at your To Do's, you may wonder how the tasks are ordered. The default sort order is by the following timeline (Due Date, Ascending):
- Tasks with a due date and time, ordered by earliest time first
- If two or more tasks have the same time, they are sorted by their Title, alphabetically
- This is followed by tasks without a time, sorted by their creation date and time
Sort by Options
You can change the sort order of tasks in the Uncompleted Tasks column by using the Sort by drop-down. You can sort by the following dates:
- Task Due Date
- Task Creation Date
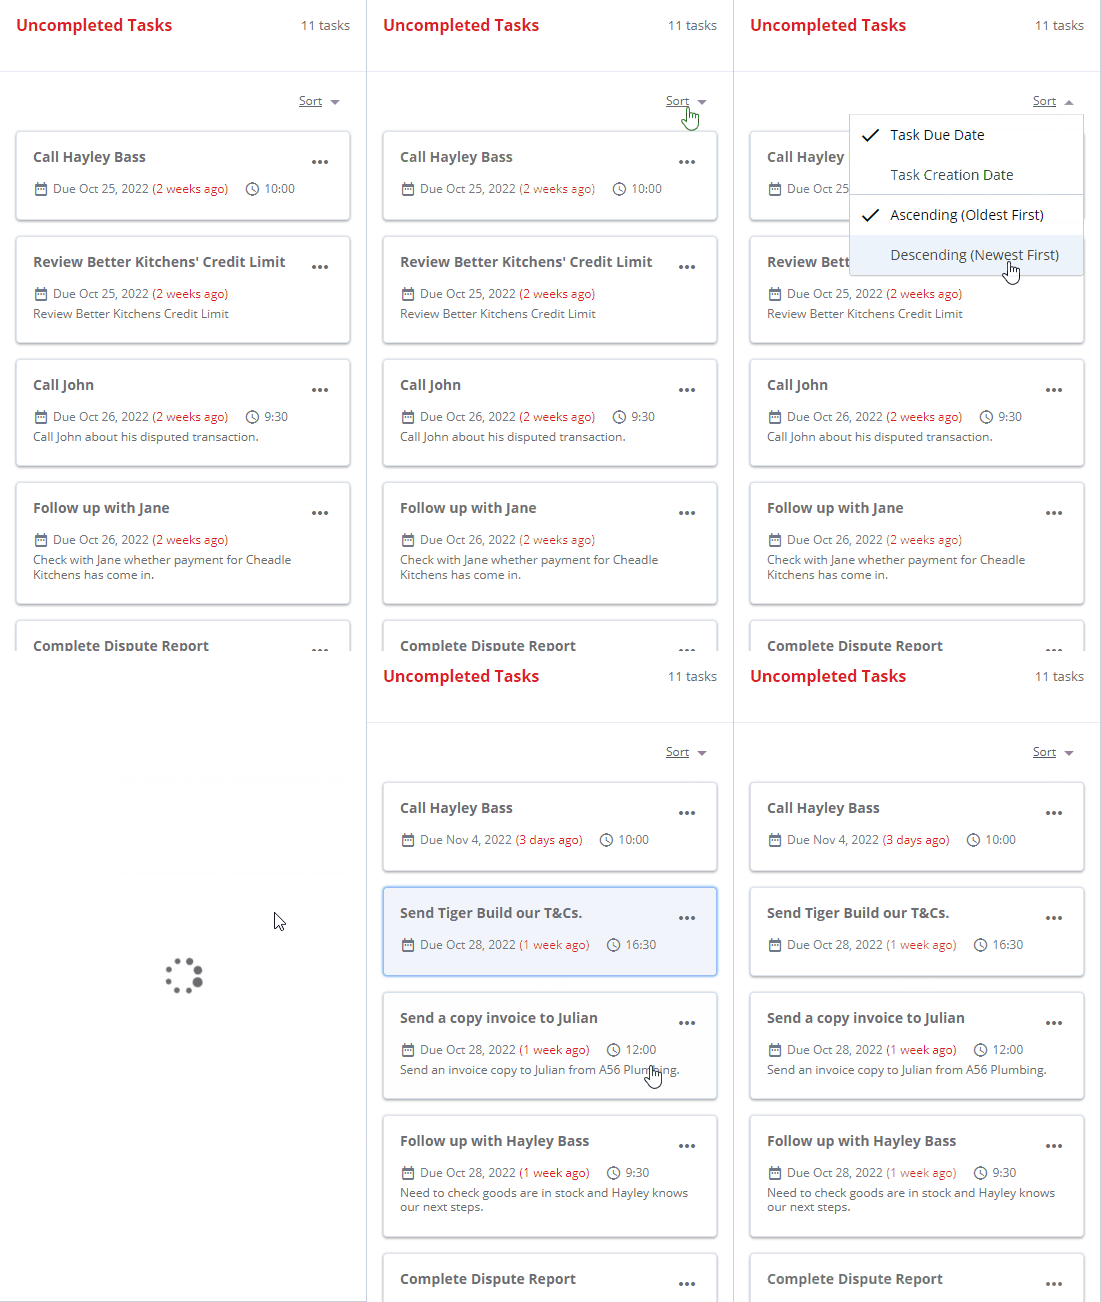
Both dates can be sorted by Ascending (Oldest First) and Descending (Newest First).
View Everyone's Tasks
Administrator Users can see their own and all other users' tasks.
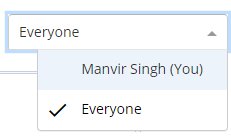
By clicking on the name drop-down in the top-right corner of the To Do area, you can select between yourself and Everyone.
Selecting Everyone provides you with an overall view of the To-Do's that your team are managing on a day-to-day basis.
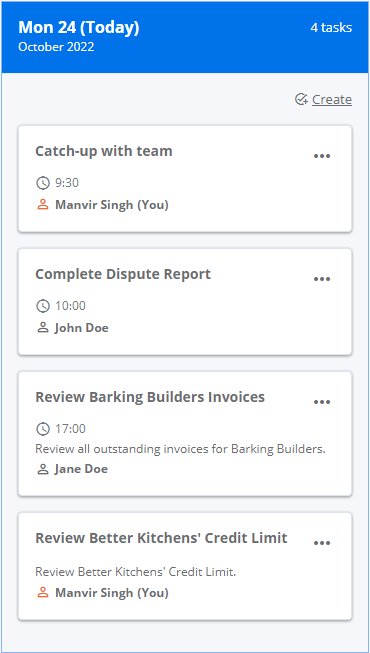
When viewing Everyone's tasks, there will be an additional name against the task card showing you who the task belongs to.
Reassign Task
An Administrator can reassign a task to another user so they become responsible for the task.
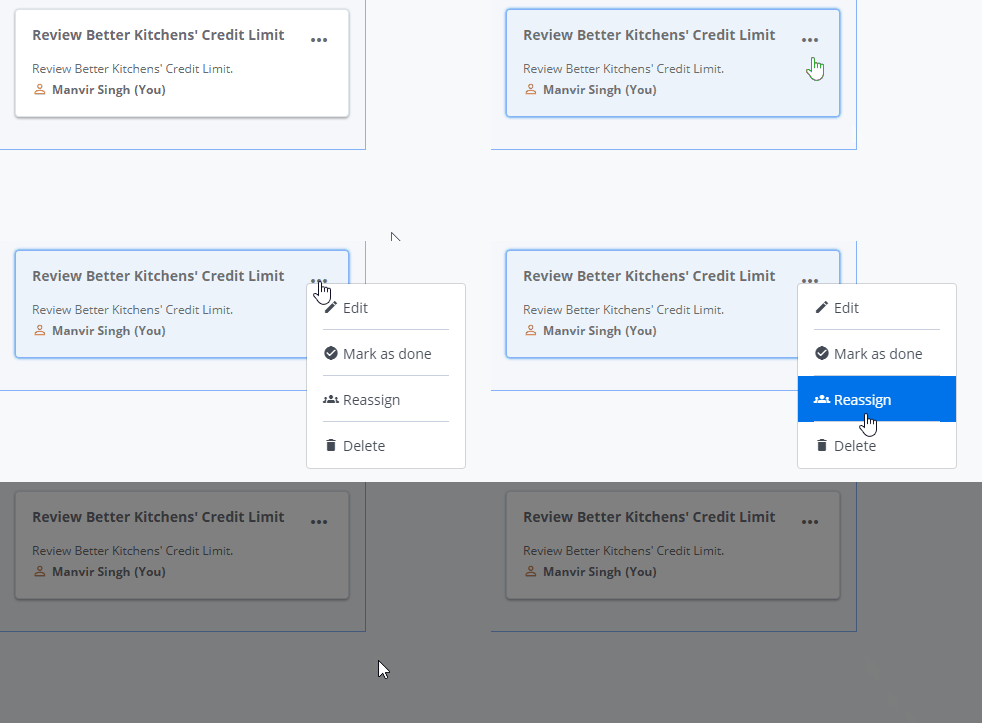
To reassign a task to another user, click on the three dots next to the task header and select the Reassign menu option.

From the dialog that appears, you can select the user who you want to reassign the task to and click Reassign.
You can also reassign a task by clicking the task to view its details and then performing the same steps in the panel on the right-hand side.
