
Emails sent to your customers can be found in the Outgoing Emails tab on the Communications screen. This includes emails sent manually as well as the automated emails sent out via Collection Paths.
 Navigating to Communications > Outgoing EmailsClicking the bell icon in the top-right menu bar will navigate to the Communications screen. From here, click on Outgoing Emails to see a central view of all your sent emails.
Outgoing Emails Grid
In the Communications screen, the Outgoing Emails grid displays the list of emails sent to your customers.
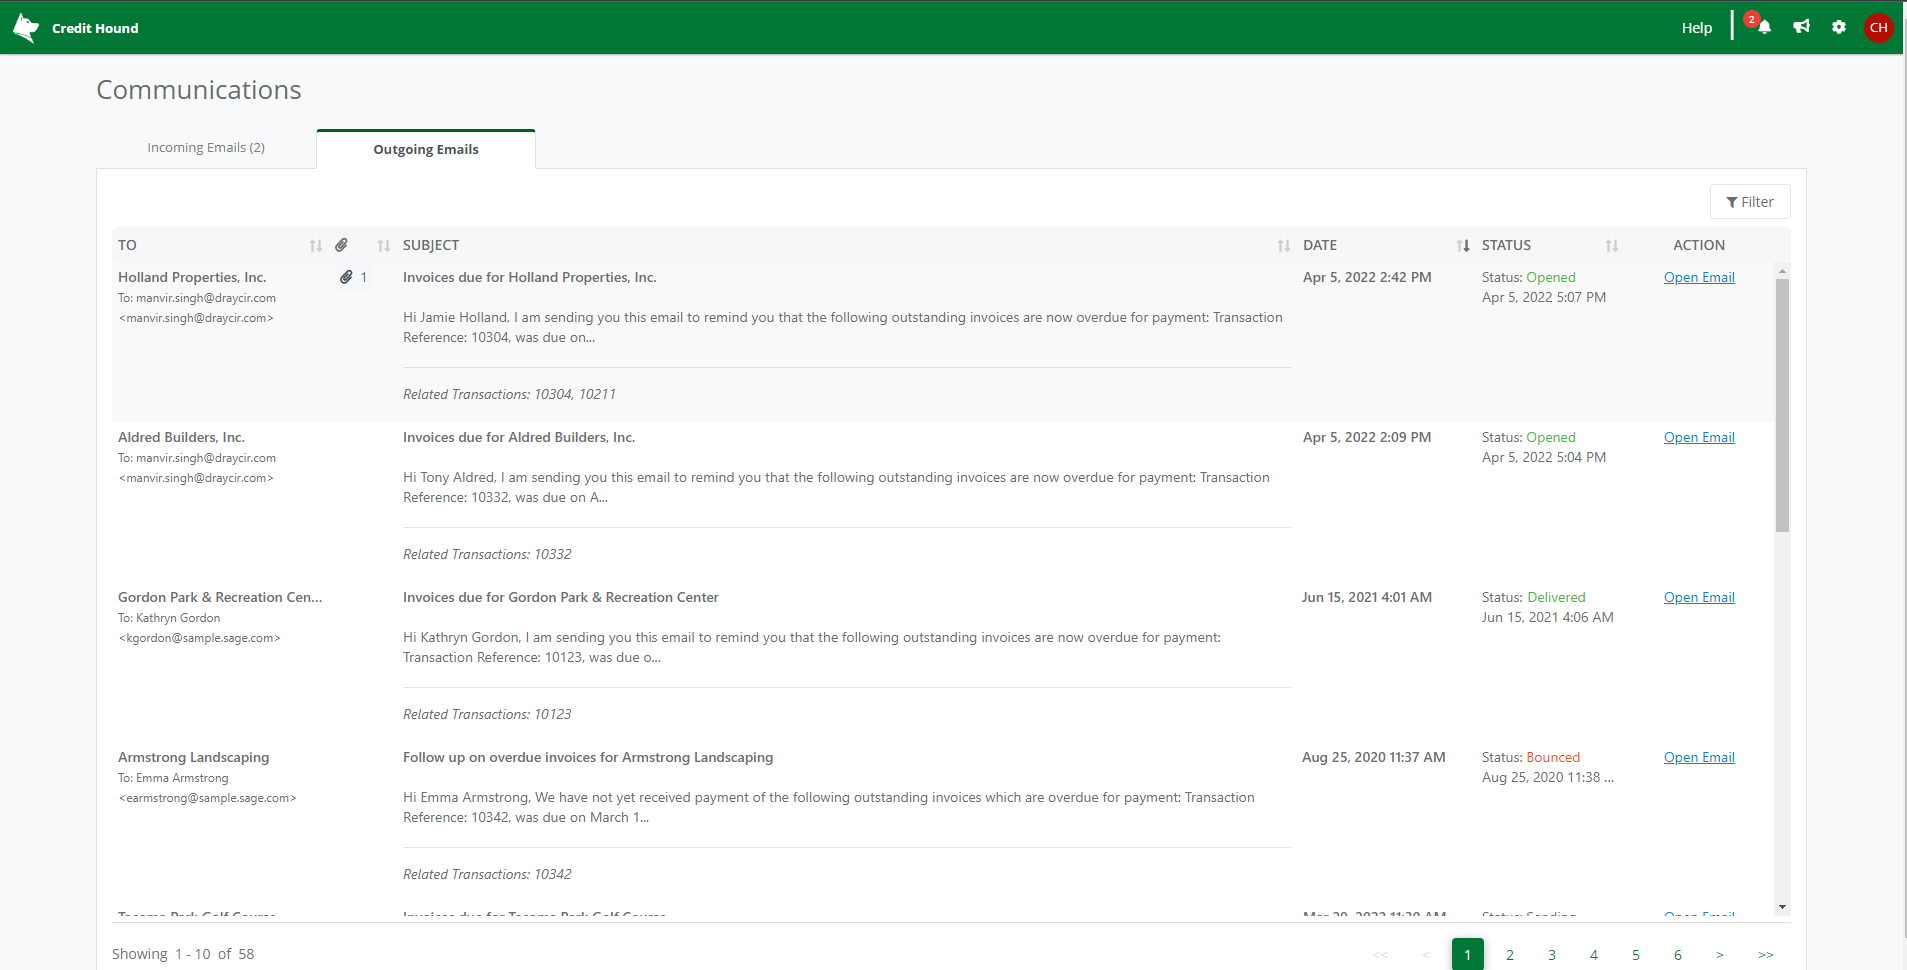
The columns in the grid are as follows:
| Column Name | Description |
|---|---|
| To | Shows the customer, name and email address that the email has been sent to. |
| Company | If you have more than one company (dataset) on your account, this column will appear showing the Company associated with the email. |
| Subject | Details the subject line and the first few lines of the email body text. |
| Date | The date the email was sent. |
| Status | This current status of the email in it's journey to the customer. See Email Statuses for more information on the different statuses. |
| Action | Contains the actions Open Email which opens the details of the email and Archive Emails. See Archived Emails for more information on archiving and restoring emails. |
Sorting
Clicking on the Date column name will sort the email list in ascending order (unless this column is already in ascending order, then it will change the sort to descending order). Clicking on the Date column name a second time will sort it in descending order (unless it is already in descending order, then it will switch it to ascending order).
The small up/down arrows icon is displayed on the current sort column. If the column is sorted in ascending order, then the arrow pointing up is highlighted black. If the column is sorted in descending order, then the column pointing down is highlighted black.
Filtering
The Outgoing Emails grid has very powerful filter options available. Data in the list can be filtered by clicking the Filter button located to the top-right of the grid. This will enable the filter boxes underneath the column names.
Click inside the relevant filter box and type in the value you want to filter by. Clicking the drop-down arrow to the right of each filter allows you to choose how that filter will be applied.
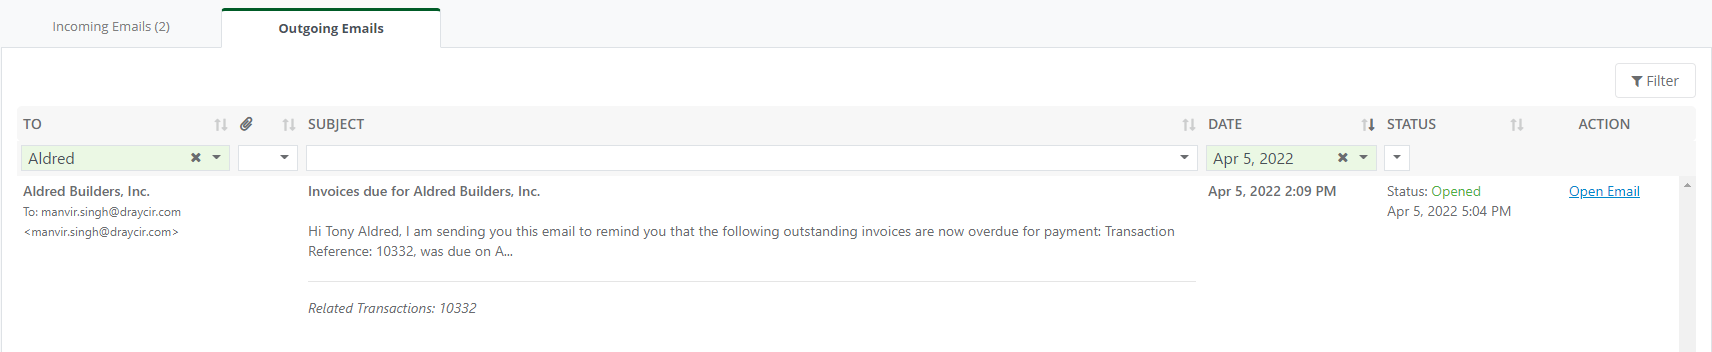 Filtered Outgoing Emails
Clicking on the filtered column for Date will bring up a date picker.
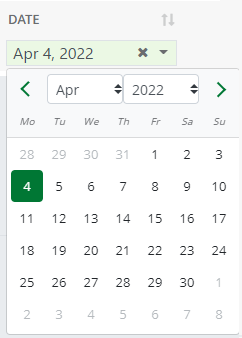
Select the date you want to filter on. You can also combine this with the filter option by clicking the drop-down arrow to the right. For example, After April 4, 2022 will list emails after this date.
You can find further information on general filtering of grids at Sorting, Filtering and Exporting.
Filtering by Company
If your account has multiple companies in Credit Hound Cloud, an extra Company column appears in the Outgoing Emails grid, displaying the associated company for each email. By default, emails from all companies are shown.
 Filtering Outgoing Emails by Company
To filter by company:
- Click the Filter button located to the top-right of the grid. This will enable the filter boxes underneath the column names.
- In the Company column, select one or more companies to refine the results.
- You can also leave the filter unselected to view emails from all companies.
You can find further information on general filtering of grids at Sorting, Filtering and Exporting.
View Sent Emails
To open up an email, click the Open Email link in the Action column. A dialog box will appear with full email details.
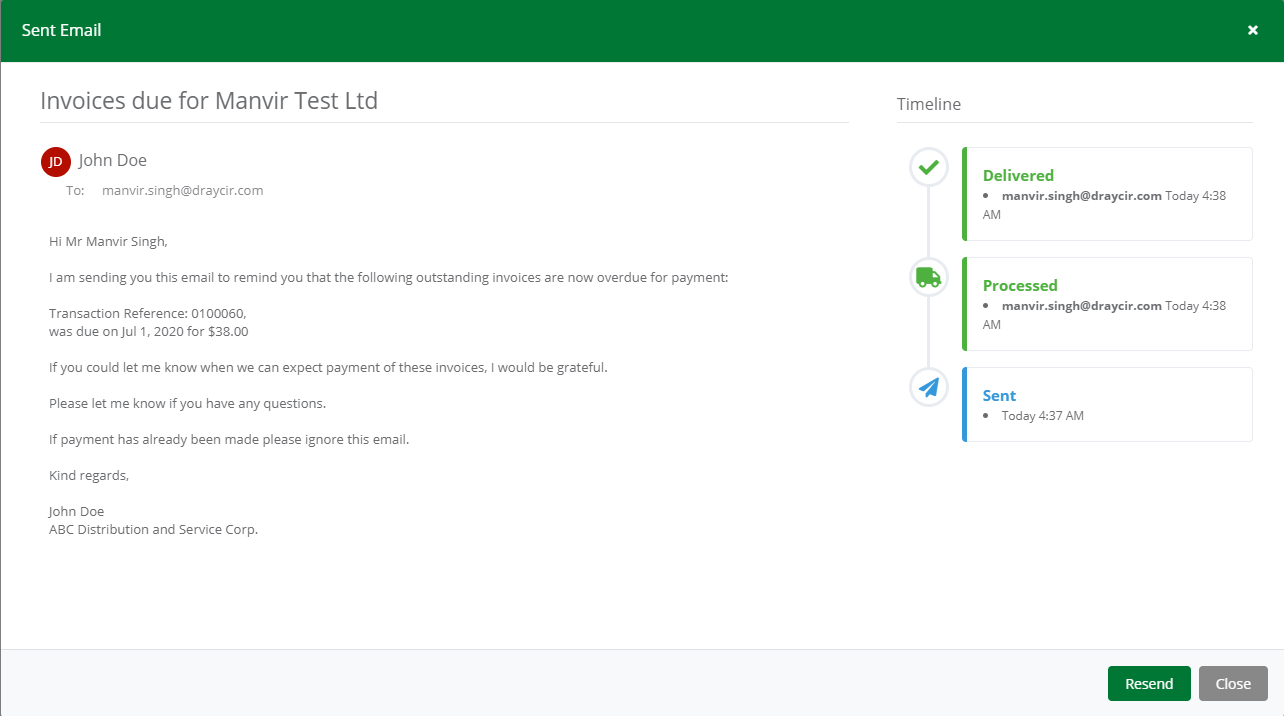 View Email
Outgoing emails are tracked and their statuses updated throughout their journey to the customer. The Timeline displays the journey that the email has been through as well as the recipient's interaction with the email, once it has been received by the customer. See Email Statuses for more information about the various statuses that Credit Hound reports back.
Note: These emails will also appear in the Activity View on the Customer Screen.
Resending Emails
- Open an email by clicking on the Open Email link in the Action column.
- The Send Email dialog box appears.
- Click Resend.
The Activity View on the Customer Screen is also updated with details of the email sent.
Forwarding Emails
- Open an email by clicking on the Open Email link in the Action column.
- The Send Email dialog box appears.
- Click Forward.
- The email editor opens allowing you to add any details above the forwarded email
- Click Send to forward the email to other recipients.