
You can insert images to brand your outbound Credit Hound emails, for both automated Collection Path and manual emails.
Read on for the steps on how to insert images into your Credit Hound emails.
Insert Images into Collection Path Emails
By Upload
Using the Upload Image option, you can select an image from your computer to be inserted into your email:
- Open up the Collection Path you want to edit.
- In the Actions collection sequence, click the Edit Email link for the Action you wish to edit. This will open up the Edit Email dialog.
- Click the Insert Image button.
- Click on the Drop image (or click) area and your computer's file explorer will be launched.
- Alternatively, drag or drop an image from your computer into the area.
- Select your image and click on Open (or double click the image).
- The image will be inserted into your email where your cursor is placed.
- Click Edit to save your changes
By URL
You can also insert an image that is stored on the web, by inputting a URL in the area provided:
 Collection Path Action - Inserting an Image by URL
- Open up the Collection Path you want to edit.
- In the Actions collection sequence, click the Edit Email link for the Action you wish to edit. This will open up the Edit Email dialog.
- Click on the Insert Image icon button and select the URL tab.
- Paste or type in the URL of your image.
- Click on the Insert button.
- The image will be inserted into your email where your cursor is placed.
- Click Edit to save your changes
You cannot select multiple image files in one go. You must add the images separately.
Insert Images into Manual Emails
By Upload
 Inserting Image into a Manual Email
- Open up the Customer that you want to email. You can find them from the Customer List
- In the Transaction list, tick the transactions that you want to include in the email.
- Click the Send Email button. This will open up the email dialog.
- Click the Insert Image button.
- Click on the Drop image (or click) area and your computer's file explorer will be launched.
- Alternatively, drag or drop an image from your computer into the area.
- Select your image and click on Open (or double click the image).
- The image will be inserted into your email where your mouse cursor is placed.
By URL
- Open up the Customer that you want to email. You can find them from the Customer List
- In the Transaction list, tick the transactions that you want to include in the email.
- Click the Send Email button. This will open up the email dialog.
- In the Actions collection sequence, click the Edit Email link for the Action you wish to edit. This will open up the Edit Email dialog.
- Click on the Insert Image icon button and select the URL tab.
- Paste or type in the URL of your image.
- Click on the Insert button.
- The image will be inserted into your email where your mouse cursor is placed.
Formatting Images in the Email Editor
The email editor offers different formatting options for your images. You can access the image formatting options when you click on an image that you would like to edit.
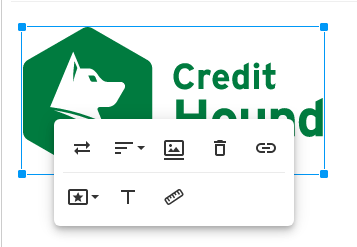
The table below describes each formatting option.
| Option | Description |
|---|---|
 | Replace: Allows you to change an image to a different one. Either insert image method described above (Upload or By URL) can be used |
.png)  .png) | Align: The alignment options are:
|
 | Image Captions: Add any text that appears as a caption at the bottom of the image |
 | Remove: Removes selected image |
.png) | Insert Link: Add hyperlinks to your images in the article. You can paste the URL of the web address in the box provided If you want the link to open in a new tab, enable the checkbox next to Open in new tab Click the Insert button. Once the image is linked, three new options appear in the image formatting tray:
|
 | Style: There are three styling options available to choose from, and a combination of styling is possible
|
 | Alternative Text: Descriptive text that helps screen-reading tools describe images to visually impaired readers. Type in the alternative text for the image in the field provided and click on Update. |
 | Change Size: Resize the image by type in the desired Width and Height in pixels (px) |
You can also resize images by using your mouse pointer to click and drag the corners of the image.