
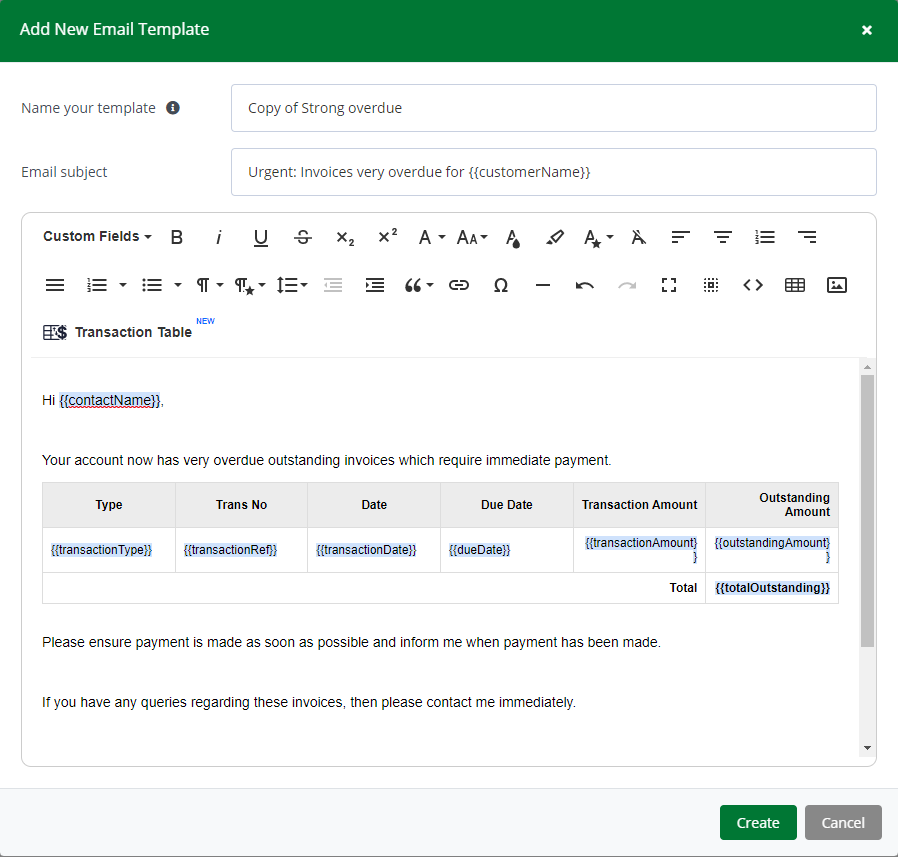
You can insert a Transaction Table for those transactions be chased, to better format your outbound Credit Hound Cloud emails.
By default, the following columns appear in the Transaction Table:
| Type | Trans No | Date | Due Date | Transaction Amount | Outstanding Amount |
| Transaction Type | Transaction Number | Transaction Date | Transaction Due Date | Transaction Amount | Transaction Outstanding Amount |
Read on for the steps on how to insert a formatted transaction table into your Credit Hound Cloud emails.
Insert Transaction Table into Manual Emails
Using the Transaction Table option in the email editor, you can have a pre-formatted table of the transactions you are chasing to be inserted into your email. Note: Please ensure you select at least one transaction before clicking the Transaction Table button:
- Open up the Customer that you want to email. You can find them from the Customer List.
- In the Transaction list, tick the transactions that you want to include in the email.
- Click the Send Email button. This will open up the email dialog.
- Click the Transaction Table button from the email editor menu.
- The structure and custom fields for the Transaction Table will be automatically inserted into your email where your mouse cursor is placed.
- Clicking on the Transaction Table button will insert a Transaction Table into the email content.
- Please ensure you select at least one transaction before clicking the Transaction Table button. The table only displays transactions that have been selected.
- The Total row will only appear when all the selected transactions have the same currency.
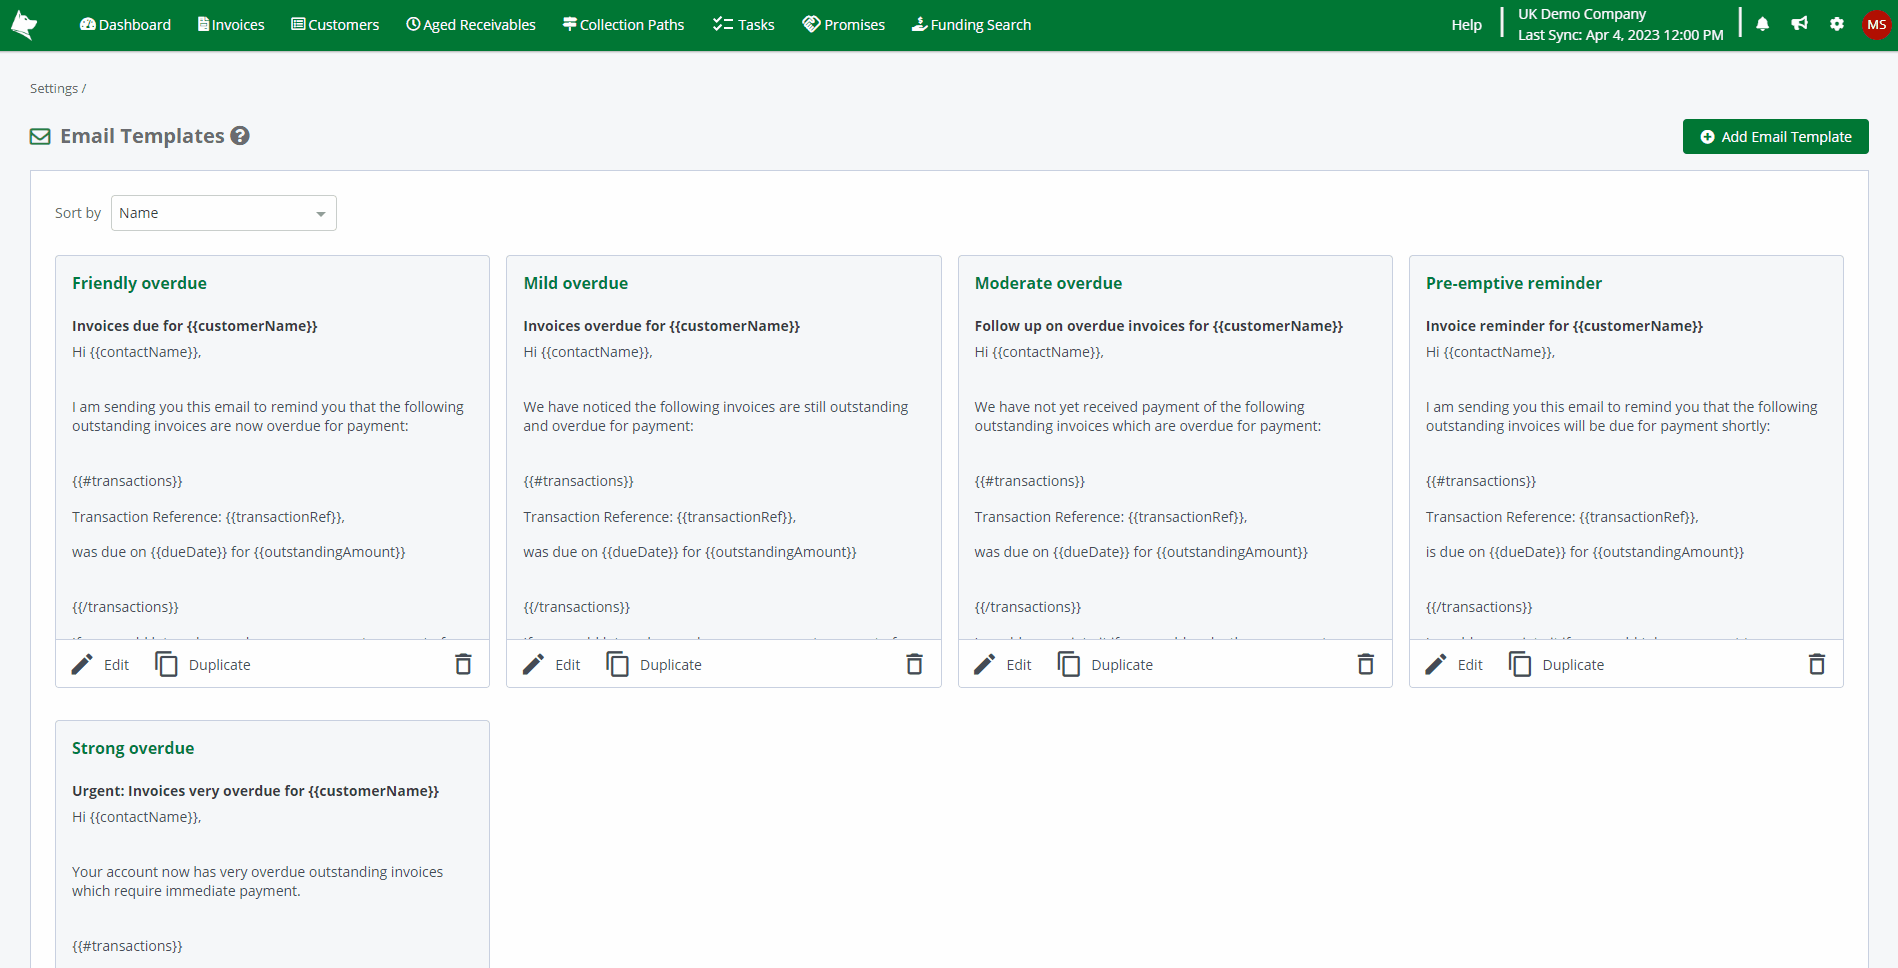
Insert Transaction Table into Email Templates
- Go to Settings > Email Templates.
- Click Add New Template, if creating a new template.
- The Email Editor will appear.
- Click in the body where you would like to position and insert your transaction table.
- Click the Transaction Table button from the email editor menu.
- The structure and custom fields for the Transaction Table will be automatically inserted into your email where your mouse cursor is placed.
- Compose the rest of your email template and click Create once happy.
Insert a Transaction Table in an existing Email Template
If you already have existing email templates that are formatted with the transactions inside the {{#transactions}} email custom fields section, you can replace this with a pre-formatted table by following the steps below.
- Go to Settings > Email Templates.
- Click Edit on an individual template from the main Email Templates screen.
- This opens the Edit Email Template dialog box.
- Remove the following transactions custom fields section:
{{#transactions}}
Transaction Reference: {{transactionRef}},
was due on {{dueDate}} for {{outstandingAmount}}
{{/transactions}}
- 5. Click in the body of the email where you want the table and then click the Transaction Table button from the email editor menu.
- 6. The structure and custom fields for the Transaction Table will be automatically inserted into your email where your mouse cursor is placed.
- 7. Check the rest of your email template and click Save once happy.