
Follow our easy Quick Start Guide to get connected to Credit Hound so you can start automatically chasing your invoices and get paid faster!
1. Connect to your Accounting System
After you have signed up for Credit Hound, you need to connect to your accounting system we can synchronize your customers and transactions.
On-premise systems require the installation of the Credit Hound Connector Agent to sync data to the cloud.
Cloud based systems like Sage Intacct or Sage Business Cloud Accounting can be connected to by entering your user credentials.
See Supported Accounting Systems for the list of accounting systems that Credit Hound integrates with. There are links to the step-by-step process of connecting with each supported accounting system.
After setting up, Credit Hound will sync your accounting system data and notify you by email once complete.
2. Invite other Users to Credit Hound
The Users section allows you to add other users from your team to Credit Hound. Go to the Settings cog icon in the top-right hand corner of the screen > and then Users
Enter the Name and the Email address of the user you want to add and their role.
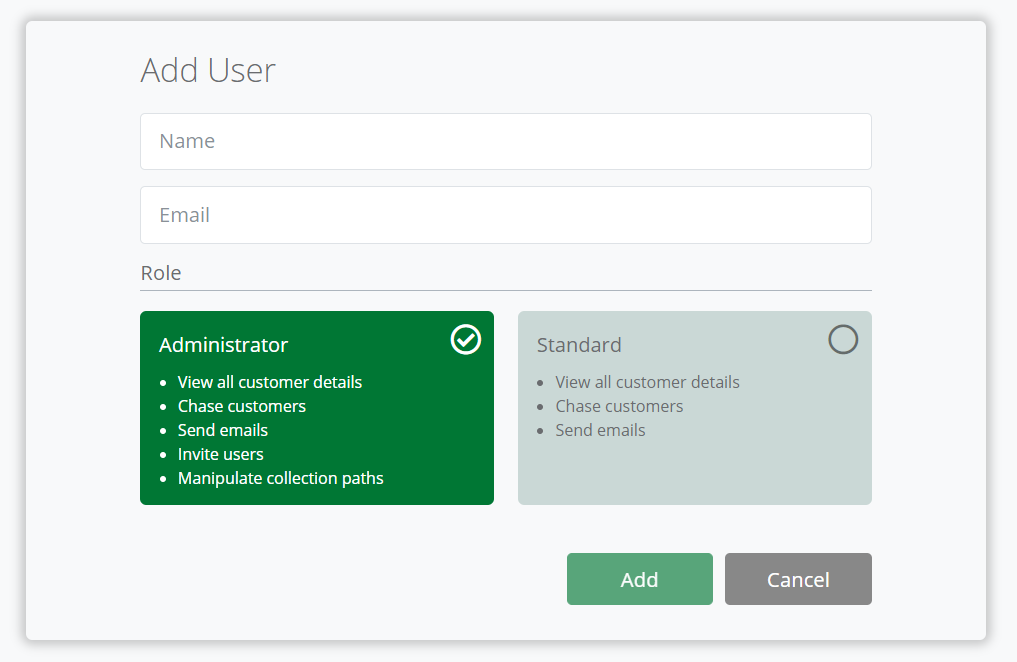
After clicking the Add button, they'll receive an email so they can join as a Credit Hound user.
See the Add, Edit and Removing Users article for more details on User Management.
3. Correct any Customer Email Issues
Before you setup your Collection Paths to chase your customers, be sure to review the Customer Email Issues widget on the dashboard, This widget displays a list of customers who cannot be automatically chased by Credit Hound until the email addresses are added or corrected.
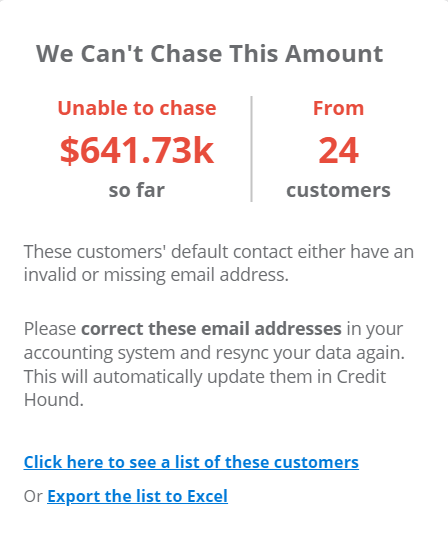
Click the link in the widget to see a list of these customers. Then correct the email addresses in your accounting system and resync your data again.
See the List of Customer Email Issues article for more information.
4. Setup your Collection Paths
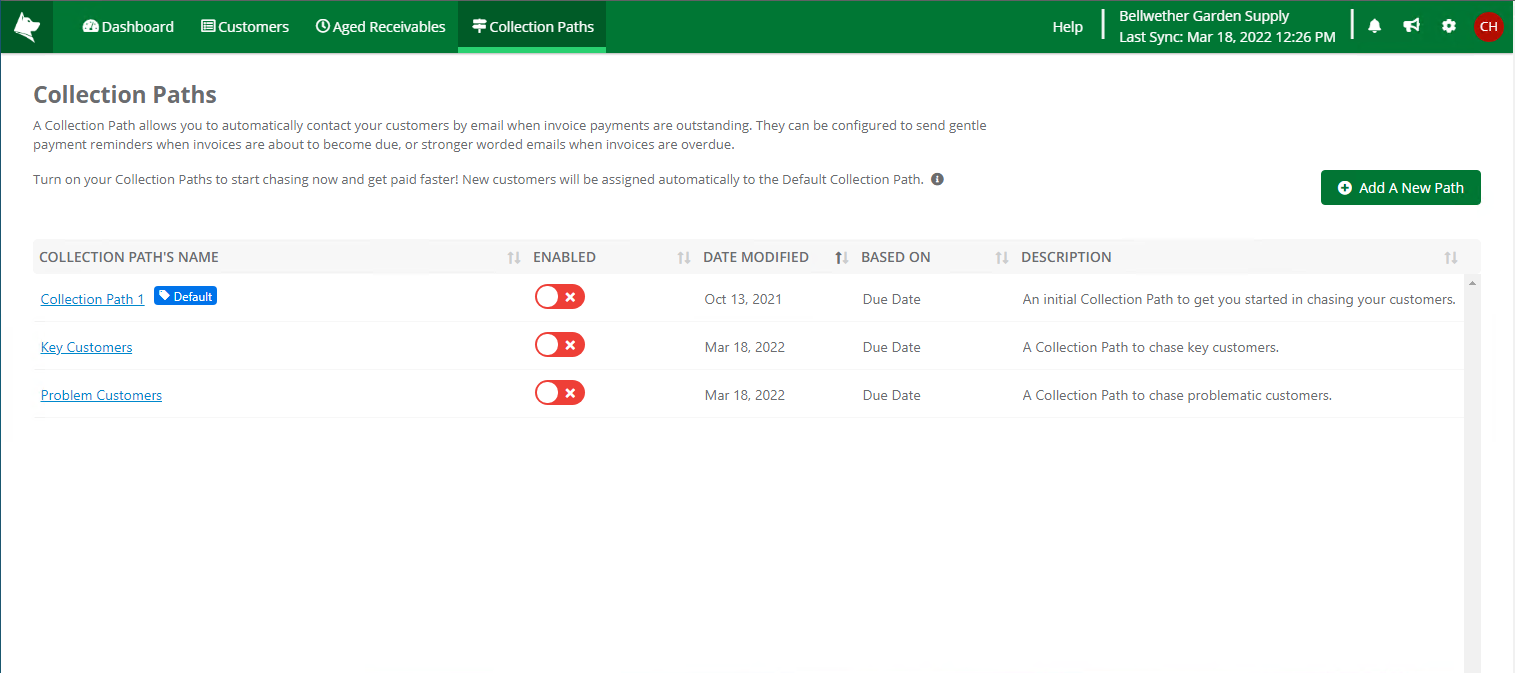
A Collection Path allows you to automatically contact your customers by email when invoice payments are outstanding. Setup multiple Collection Paths with their own sequence of steps to alter the tone and language to target different groups of customers.
Add your Collection Paths
- Go to Collection Paths from the menu and view your existing Collection Paths. Click on Add Path to create a new Path.
Configure your Collection Sequence and Email Content
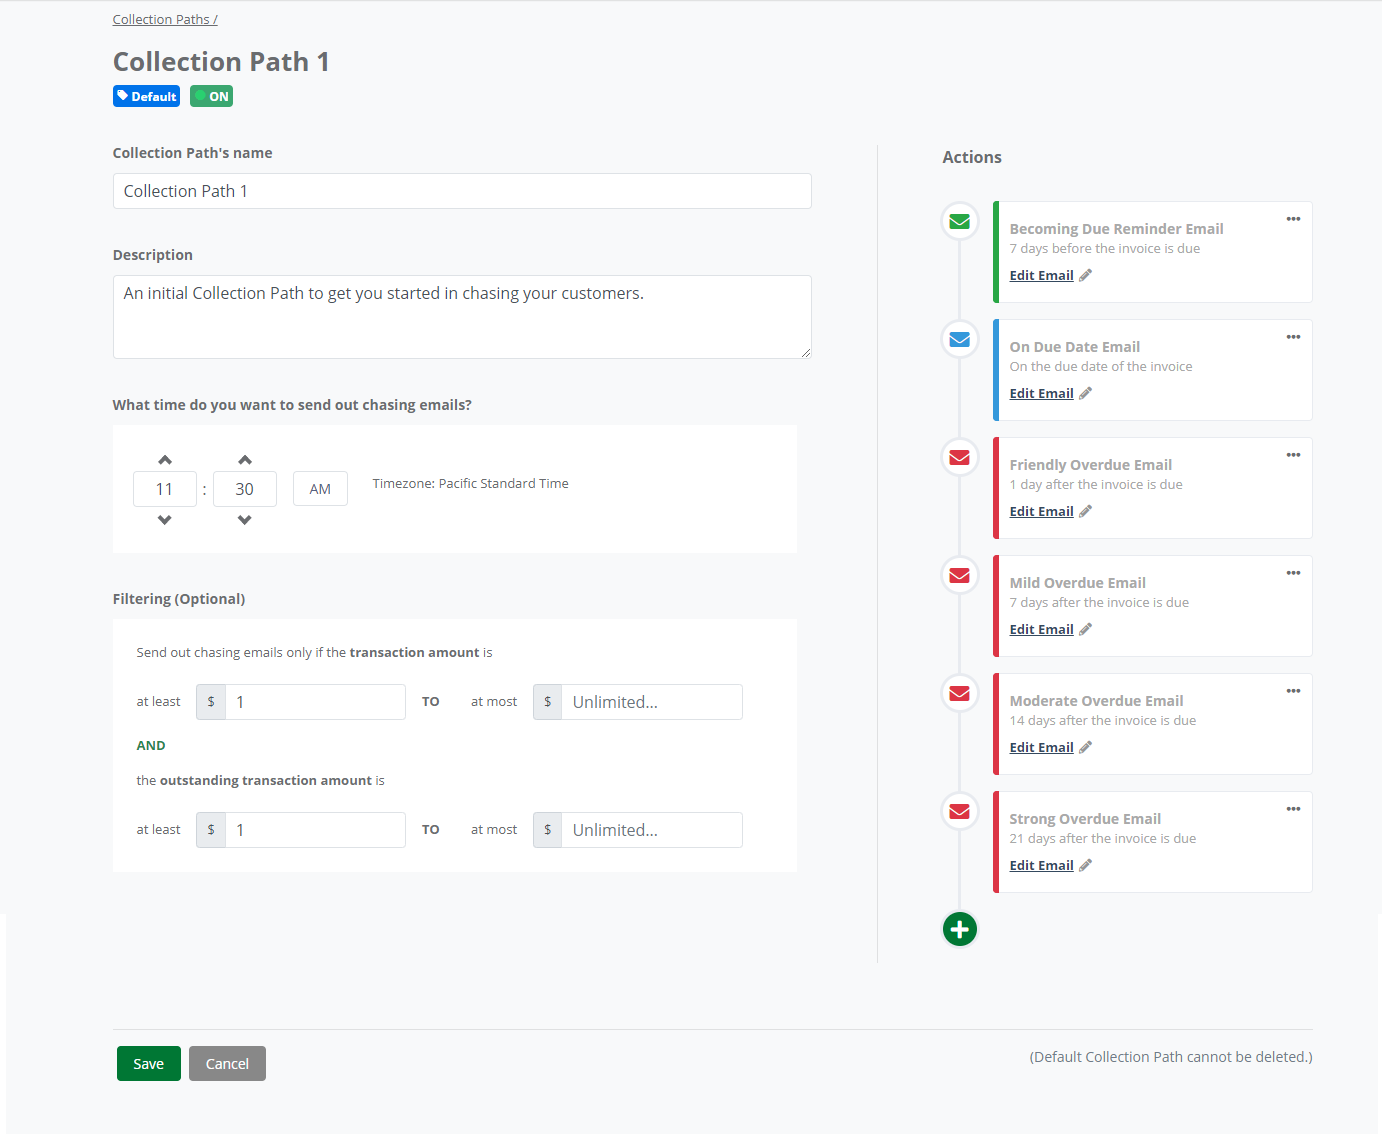
- Schedule your sequence of steps around the due date of your invoices: On, Before or After the Due Date
- Edit the predefined email template to use your own content and company branding.
Schedule the time
- Schedule your preferred time that Collection Path emails will be automatically sent out everyday.
See Configure a Collection Path to read more.
5. Assign your Customers to Collection Paths
From the Customers List, select your customers, click on the Action button and then click on the Change Collection Path menu option. You will be presented with a dialog from where you can select the Collection Path that you would like the customer to be on.
See Changing a Customer's Collection Path for more details.
Your now ready to start using Credit Hound to chase your invoices and get paid faster!