
By default, emails sent from Credit Hound Cloud arrive from a credithoundcloud.com address. For example, if your email address is accounts@example.com, your customers will see the emails arrive from accounts-example-com@credithoundcloud.com.
Setting up a custom email domain lets you send from your own domain instead, so your customers see accounts@example.com.
To do this, you add your domain in Credit Hound Cloud and then add three DNS records at your domain provider. Those records prove you own the domain and allow Credit Hound Cloud to send email on its behalf.
Note
Custom email domains are available to all companies in your account. Only Administrators, Configurators and Product Owners can view or change this setting.
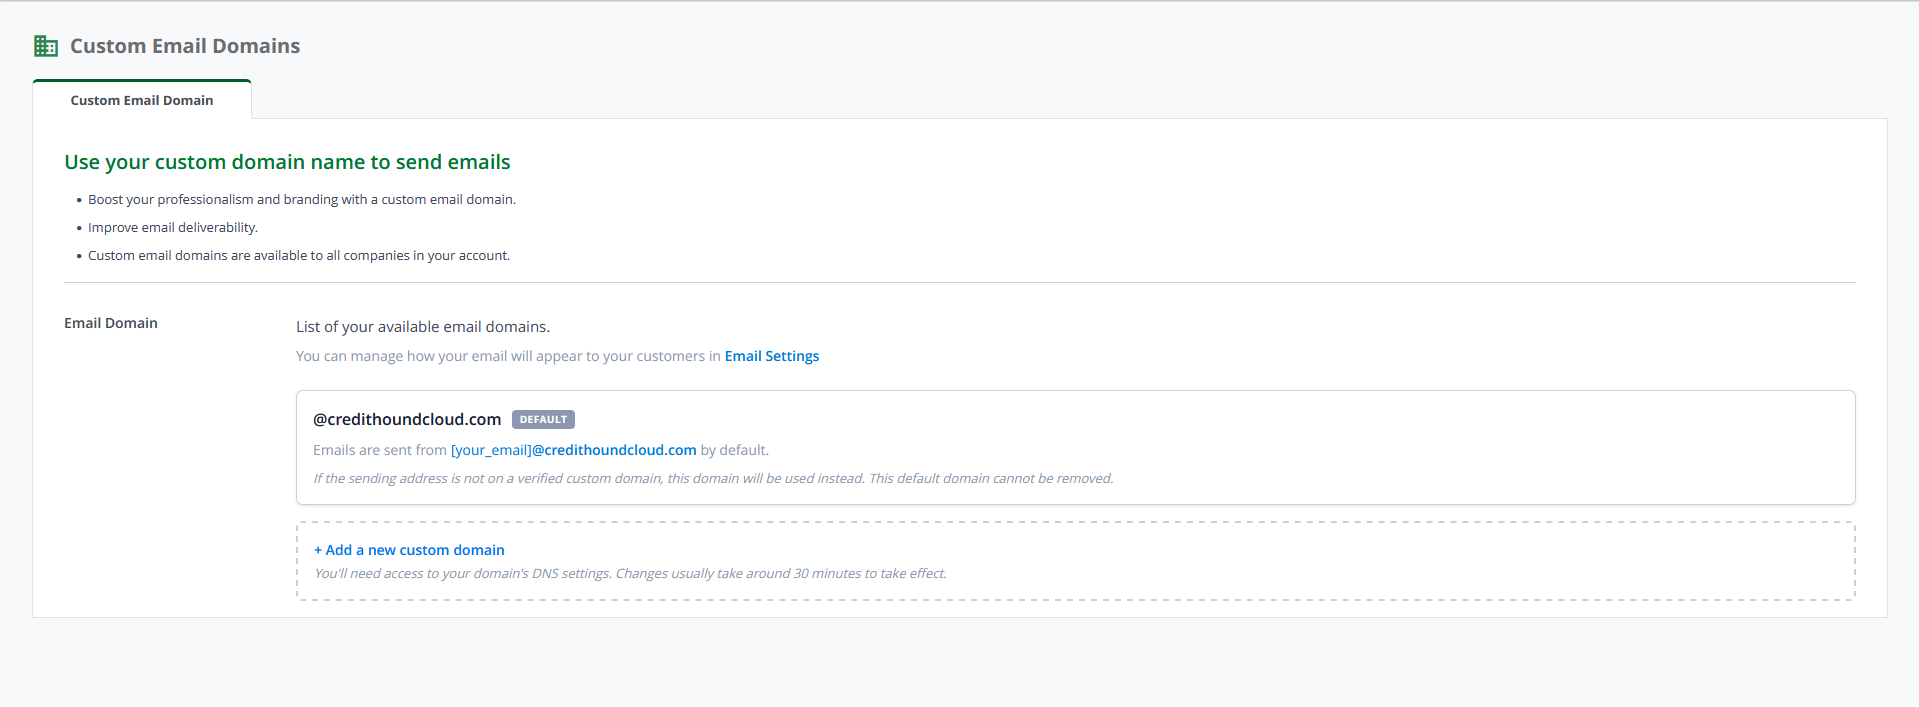
The Custom Email Domains page
Before you start
You will need:
Access to your domain provider's control panel to add DNS records. If your organisation has an IT team, they will usually manage this.
Your domain name
DNS changes usually take around 30 minutes to take effect, but can take up to 48 hours depending on your provider. You can leave Credit Hound Cloud and return later. Your domain and its DNS records are saved.
Add a custom domain
Click the Settings cog and choose Custom Email Domains.
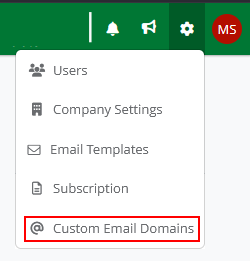
Settings cog menu
Click Add a new custom domain.
Enter the domain you want to send emails from, then click Add Domain.

Entering your domain
Credit Hound Cloud displays three CNAME records. Add these to your domain provider - see Add the DNS records below.
Once the records have been added, tick All DNS records have been added and click Verify.
While verification is outstanding, the domain is listed with a Not Verified badge and its DNS records stay on screen so you can return to them. Once verification succeeds, the badge is removed and the records are collapsed. You can reopen them at any time using the arrow on the right of the domain - useful if you ever change DNS provider and need to add the records again.
Add the DNS records
The three records shown in Credit Hound Cloud are unique to your domain. Copy each Host and Points To value using the copy icon beside it.
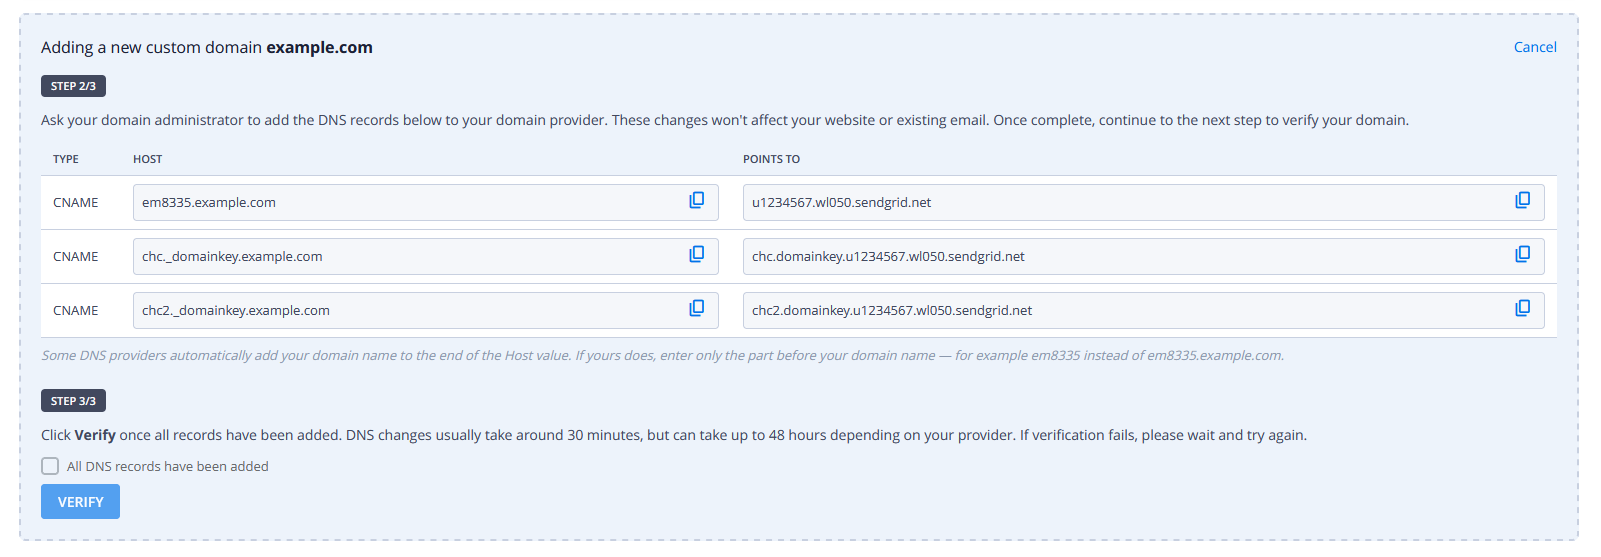
The DNS records to add

Use the copy icon to copy each value
The steps to add DNS records vary by provider, but generally:
Sign in to your domain provider's website.
Open your DNS configuration settings. This is usually found under DNS Records, DNS Zone File or Advanced DNS.
Add each record provided by Credit Hound Cloud as a new CNAME entry.
Save your changes.
Does your provider add the domain name for you?
Some DNS providers automatically add your domain name to the end of whatever you type in the Host field. If yours does, enter only the part before your domain name.
For example, where Credit Hound Cloud shows a Host of em8335.example.com:
Your provider | What to enter |
|---|---|
Adds your domain automatically | em8335 |
Does not add your domain | em8335.example.com |
If you are not sure which applies, look at an existing record in your DNS panel and follow the same convention. Entering the full value at a provider that appends automatically creates a record like em8335.example.com.example.com, which will not verify.
Verify your domain
Click Verify once all three records have been added.
If verification succeeds, the domain is listed without a badge and can be used for sending.
If verification fails, Credit Hound Cloud shows a message against each record that could not be found or did not match.
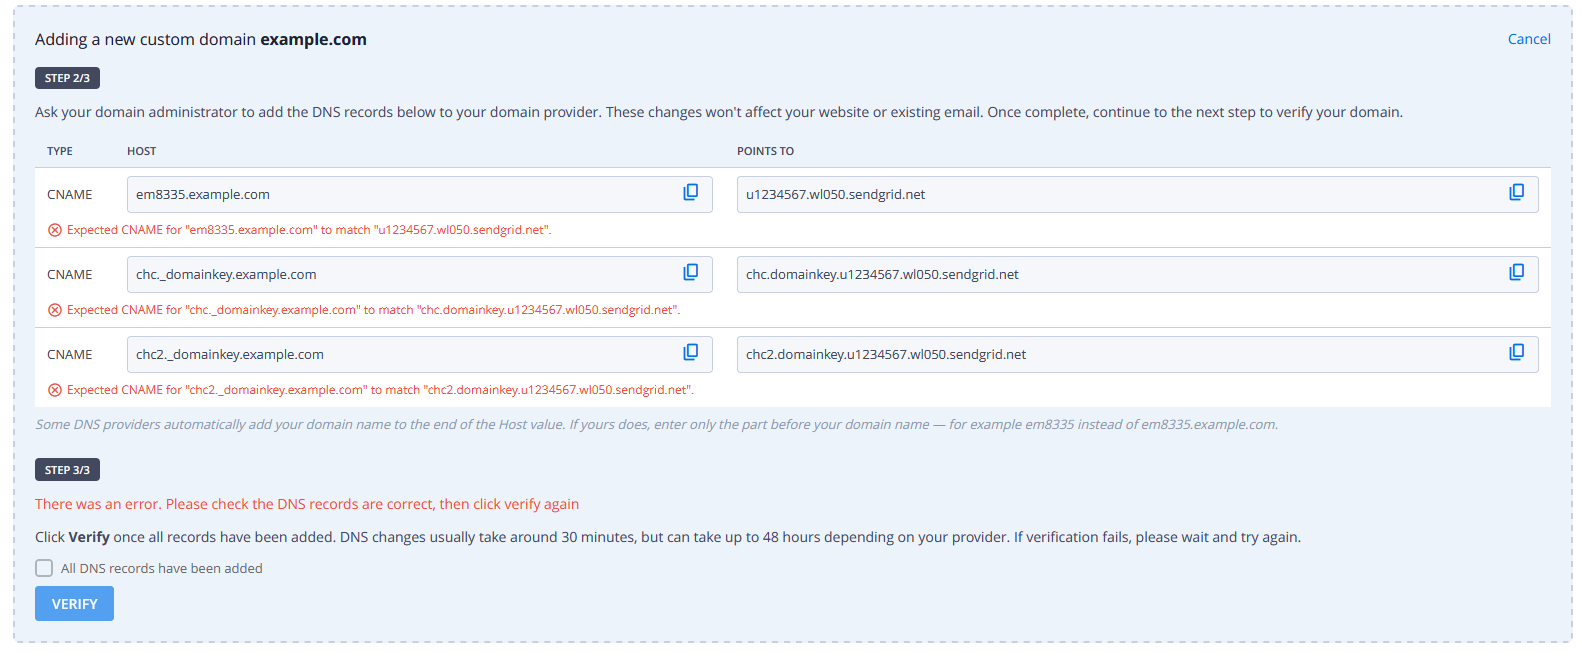
Verification errors shown against each record
The same message appears whether a record is missing altogether or does not match what is expected. In most cases the records are correct and simply have not finished propagating. Wait and click Verify again before changing anything.
If verification keeps failing
Check | What to look for |
|---|---|
Enough time has passed | Records can take up to 48 hours to propagate. |
The domain name is not duplicated | If the Host value ends in your domain twice, remove the domain from what you entered. See the section above. |
The record type is CNAME | Not A, TXT or ALIAS. |
Values are complete | Nothing truncated, and no trailing full stop unless your provider adds one automatically. |
Underscores are supported | The two _domainkey records contain an underscore. A small number of DNS providers do not allow underscores in record names. If yours does not, contact your provider. |
If the records are correct and verification still fails after 48 hours, contact support@draycir.com.
After your domain is verified
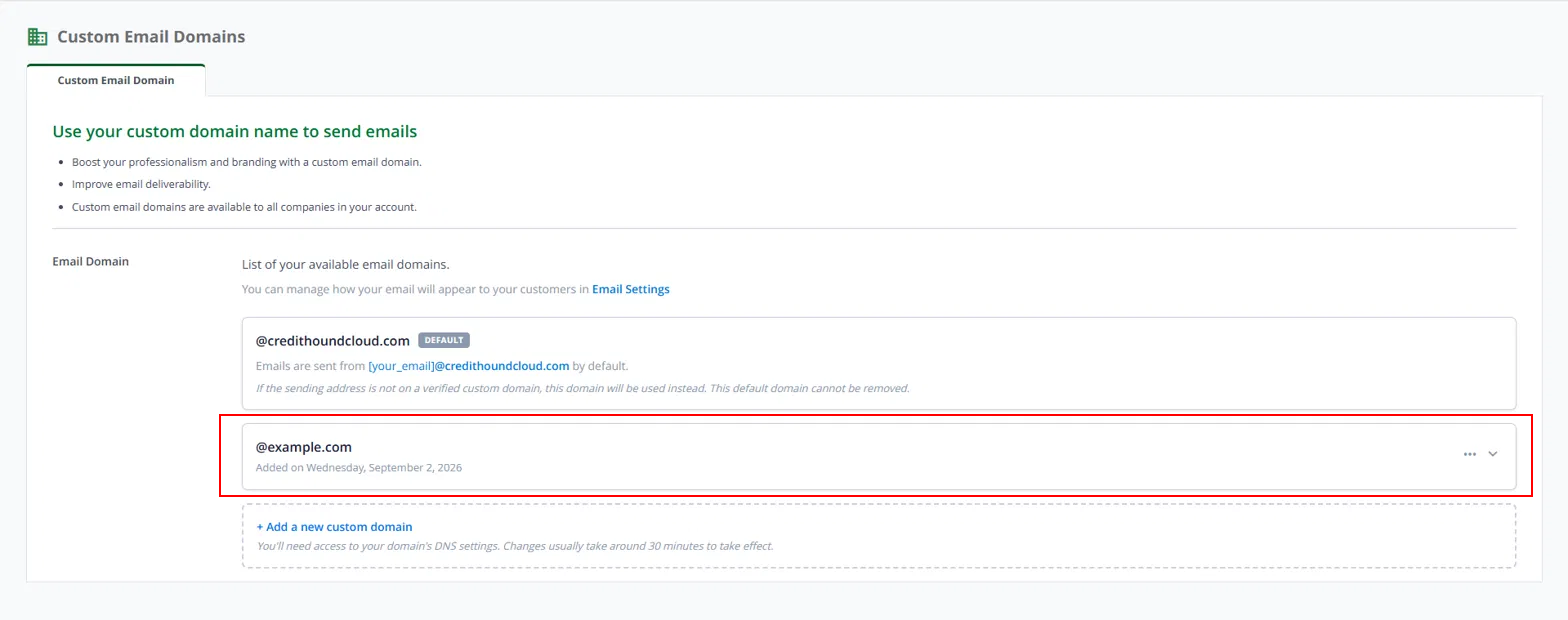
A verified custom domain, listed with the date it was added
Emails will be sent from your own domain wherever the sending address uses that domain. If the sending address is not on a verified custom domain, the default credithoundcloud.com address is used instead.
You can review and change the addresses your emails are sent from in Email Settings. Collection Path and Statement emails use the From Email set there, and this is configured separately for each company.
Remove a custom domain
To remove a custom domain, click the ··· menu beside the domain and choose Delete this domain.
Before removing a domain, check that no company's Email Settings still uses an address on it. If one does, those emails will start sending from the default credithoundcloud.com address again.
The default credithoundcloud.com domain cannot be removed.
Frequently asked questions
How do I use a custom email domain?
Verifying a domain does not change your emails on its own. It gives Credit Hound Cloud permission to send from that domain - you then choose which address to use.
Collection Path and Statement emails use the From Name and From Email set in Company Settings > Email Settings. If that From Email is on a verified domain, emails are sent from it. This is configured separately for each company, so different companies can send from different domains.
Manual emails, such as those sent from the Customer Screen, use your own user login email address. If your address is on a verified domain, your emails are sent from your domain too.
Why are my emails still arriving from credithoundcloud.com?
If your emails still arrive from credithoundcloud.com, the From Email is on a domain that has not been verified. The email still sends, but from the default address. Check that the domain in your From Email matches a verified domain exactly.
I already send from my own domain. Do I need to do anything?
No. If your custom email domain was set up with our support team, nothing changes - your existing setup continues to work. You will see the domain listed on the Custom Email Domains page with the date it was added.
Depending on when your domain was set up, the DNS records may not be shown when you expand it. This does not affect your emails - the records are already in place at your domain provider. If you need them again, for example if you change DNS provider, contact support@draycir.com.
Where do replies go?
Verifying a custom domain does not change how replies are handled. Replies are controlled separately, in Company Settings > Email Settings.
By default, replies come back into Credit Hound Cloud so they appear against the customer alongside the chase. For this to work, the reply address is a credithoundcloud.com address containing a reference that identifies which customer and which email the reply belongs to. Your contacts still see your own address in the From field.
If you would rather replies went to your normal mailbox, tick the Email Replies option in Email Settings. Replies then arrive in your own email client and do not appear in Credit Hound Cloud.
Will this affect my website or my existing email?
No. The records only add sending permission for Credit Hound Cloud. They do not change where your website points or how your normal email is delivered.
Do I need to change my SPF record?
Not usually. The CNAME records handle authentication on their own. If your organisation has a strict email policy and your IT team asks about SPF, they can add include:sendgrid.net to your existing SPF record.
Can I add more than one domain?
Yes. Repeat the steps above for each domain you want to send from. Each company's Email Settings then decides which domain that company sends from.