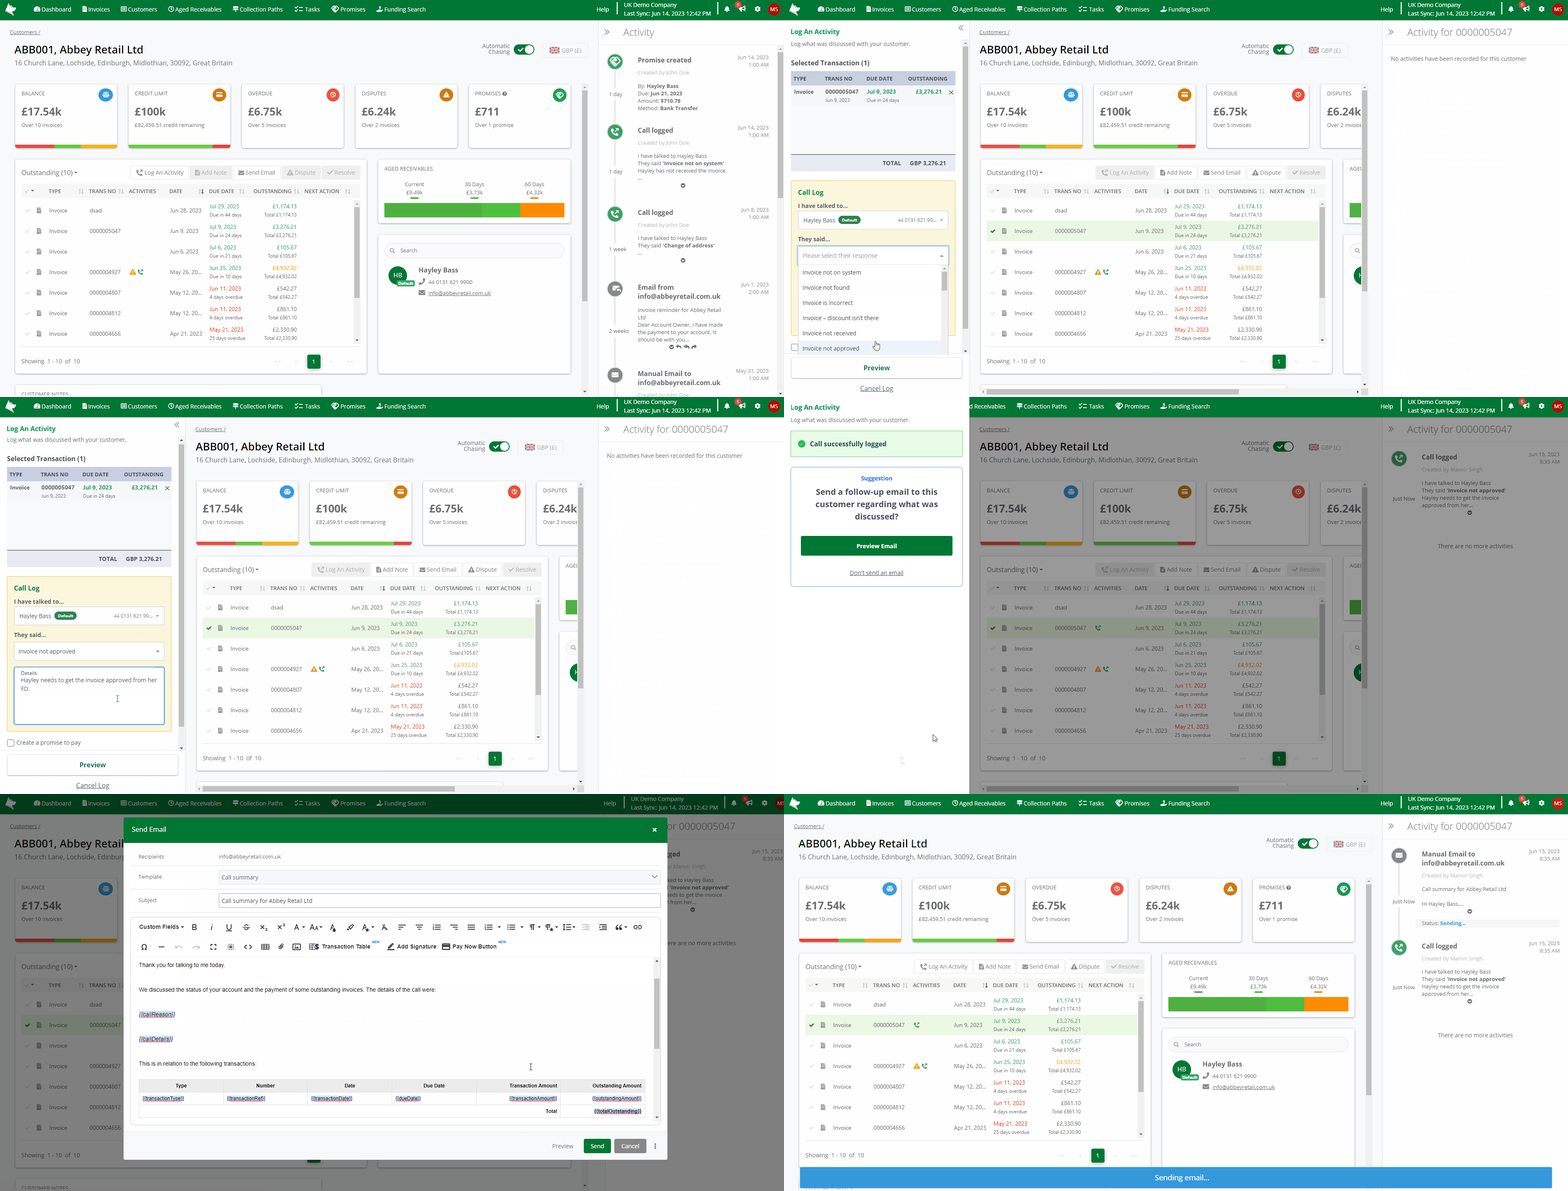
After you have chased your customer and recorded the details of the conversation via the Log An Activity process, it is a good idea to follow-up with an email reinforcing the details of the conversation or promise to help increase chances of payment.
By sending a follow-up email promptly after the chase for payment, you significantly increase the chances of receiving a timely response from your customers. The reminder serves as a gentle nudge and ensures that your invoice remains on top of their priority list, while also demonstrating a commitment to maintaining strong business relationships.
Once the call has been successfully logged in Credit Hound Cloud, you will be prompted with a suggestion on whether you want to send an email to the customer what was just discussed, saving you time and effort.
Call Follow-Up Email
A "Call Follow-Up" email serves as a valuable reminder to your customer, summarizing the key points discussed during the call. This type of email is triggered when a call has been logged, but no promise to pay has been created. Sending a follow-up email offers several benefits:
- Reinforces important discussion points:
- By summarizing the conversation, you help them retain critical details, such as agreed-upon action items or specific next steps.
- Improves clarity and understanding of the call:
- Provides an opportunity to recap any information discussed during the call, ensuring that both parties are on the same page and minimizing the risk of misunderstandings.
- Becomes a reference and an audit of the conversation
How to Send a Call Follow-Up Email

- Open up the Customer that you want to email and Log An Activity
- Once the call has been successfully logged, from the resultant panel, click on the Preview Email button This will open up the email dialog.
- By default the Recipients To field will be populated by the default contact. You can change these this by:
- Delete any recipients by clicking the X icon next to them.
- Add new recipients by typing out the contact name - a list of filtered contacts will be displayed.
- Add new recipients by typing in the email address.
- A predefined template is selected to be the Call summary email template.
- See Follow-Up Email Templates for further details on this type of template
- You can edit the Subject field, which may already have been populated by the template.
- If you want to edit the email text before sending the email, click in the body and customize the text.
- You can see how the email will look before you send it by clicking Preview. This displays the email and the custom fields as the recipient would see it. Click on Compose to return back to the editor.
- Click Send to deliver the email, or Cancel if you no longer wish to email the customer.
- A blue notification bar will appear along the bottom of the screen once the email has been sent.
Promise Follow-Up Email
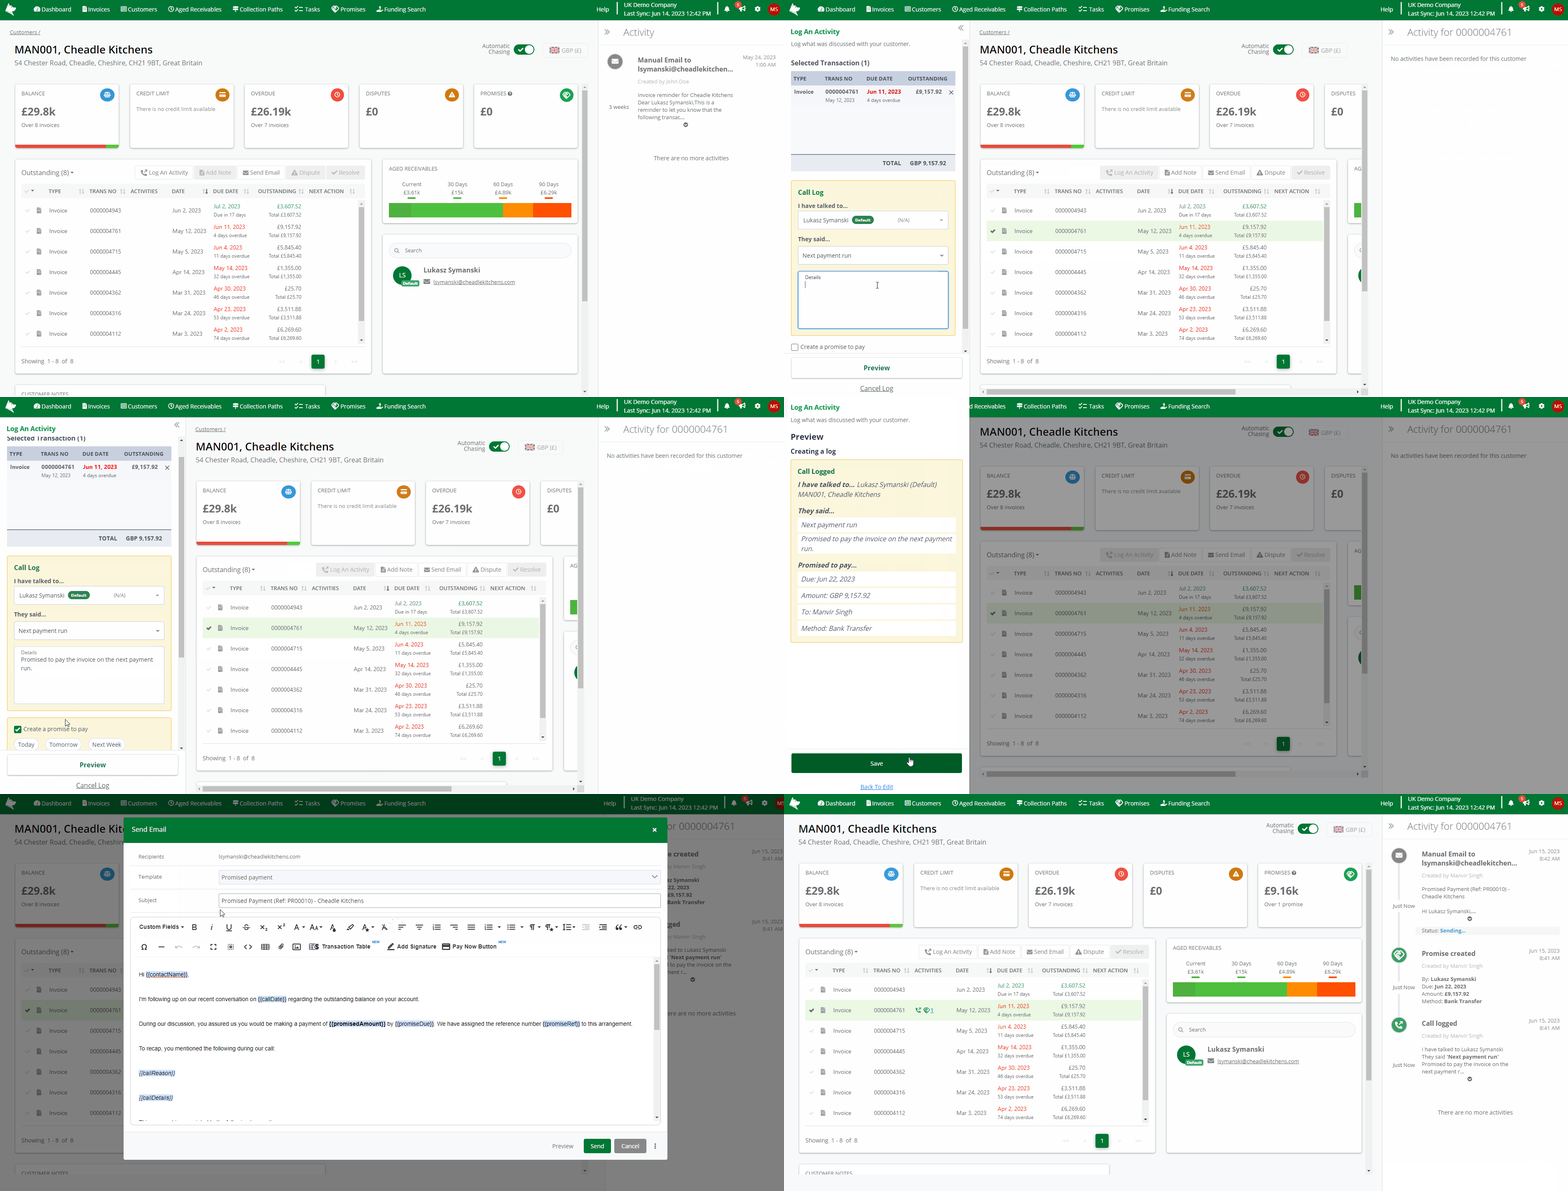
A "Promise" follow-up email is triggered when a call has been logged, and the customer has promised to fulfill payment. Sending a follow-up email in this context offers the following benefits:
- Reinforces the customer's commitment:
- By promptly sending a follow-up email after the customer has made a promise to pay, you reinforce the commitment they have made. This gentle reminder helps ensure that they follow through on their commitment and prioritize the payment accordingly.
- Encourages timely payment:
- The follow-up email acts as a proactive step towards encouraging timely payment fulfillment. It reminds the customer about their promise and prompts them to take the necessary action promptly, minimizing any delays in receiving the payment.
How to Send a Promise Follow-Up Email

Open up the Customer that you want to email and Log An Activity, and create a promise to pay.
- Once the call has been successfully logged, from the resultant panel, click on the Preview Email button This will open up the email dialog.
- By default the Recipients To field will be populated by the default contact. You can change these this by:
- Delete any recipients by clicking the X icon next to them.
- Add new recipients by typing out the contact name - a list of filtered contacts will be displayed.
- Add new recipients by typing in the email address.
- A predefined template is selected to be the Promised payment email template.
- See Follow-Up Email Templates for further details on this type of template
- You can edit the Subject field, which may already have been populated by the template.
- If you want to edit the email text before sending the email, click in the body and customize the text.
- You can see how the email will look before you send it by clicking Preview. This displays the email and the custom fields as the recipient would see it. Click on Compose to return back to the editor.
- Click Send to deliver the email, or Cancel if you no longer wish to email the customer.
- A blue notification bar will appear along the bottom of the screen once the email has been sent.