A promised payment is an agreement with a customer for them to pay a specific sum of money by a certain date. A promise to pay can be created so that if a customer is unable to make payment immediately, or plan to pay at a later date, this can be recorded and tracked within the system.
These promised payments can then be managed via the Promises List so that you know when a payment is expected to come in or if it is broken, which is important for your cash flow.
Create a Promise to Pay from Log An Activity
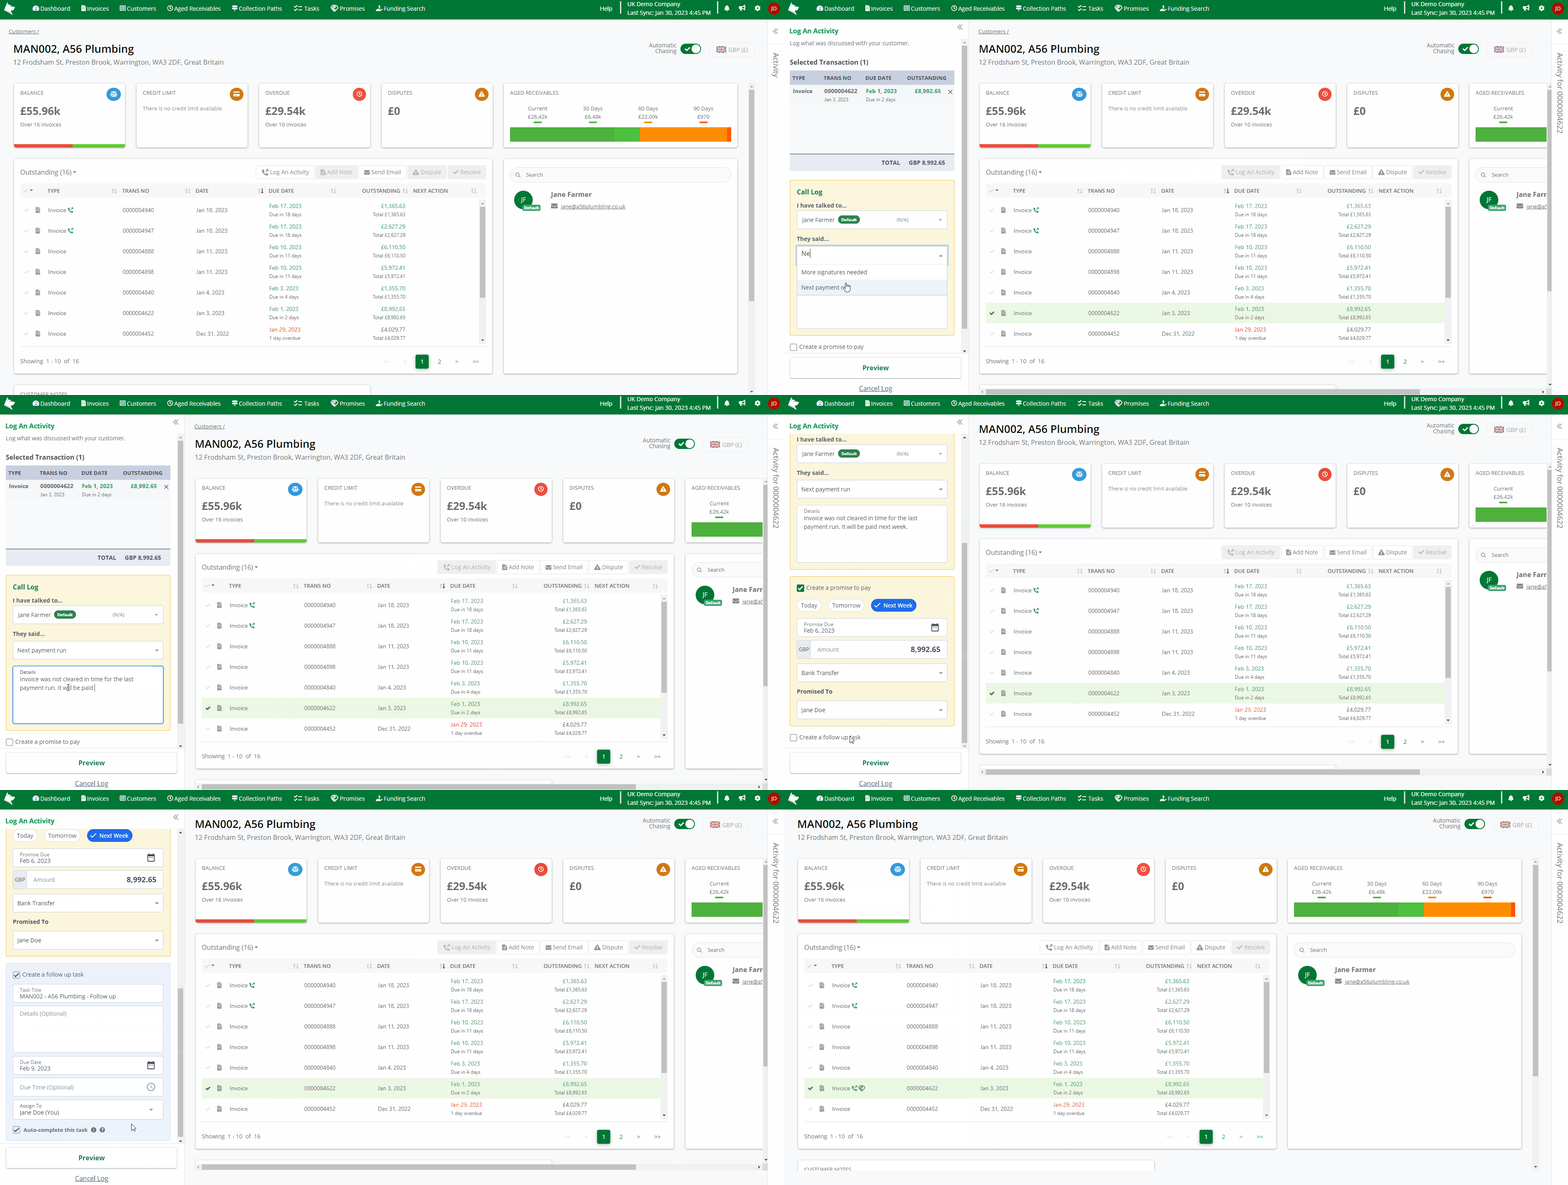
When you are chasing your customers for unpaid invoices via the Log An Activity process on the Customer Screen, you can create a promise to pay from the customer.
For example, after making a call to a member of the customer's accounting team, the contact advises the transaction was missed on the last payment run. He agrees that he can promise to pay the amount during the next payment run next week.

The steps to follow to create a promise to pay are:
- Navigate to the Customer Screen
- Select the transactions and click Log An Activity
- Select the contact and what They Said as 'Next payment run' along with the notes of the conversation
- Click on the 'Create a promise to pay' checkbox and input the promise details:
- Promise Due: You can use the 'chips' to quickly define the Promise Due date. You can select Today, Tomorrow or Next Week. Alternatively, use the calendar to select the date the promise is due by.
- Amount: By default, the full promise amount is displayed but you can change this to be a partial amount.
- Payment Method (Optional): e.g. Bank Transfer.
- Promised To: The Credit Hound Cloud user the promise was made to. By default, the person creating the task is selected.
Balance reducing transactions like Receipts and Credit Notes can be added to the promise along with Invoices, however the total of the promised amount must not be negative.
- You can optionally set a follow up call by creating a task to check if the promise was fulfilled and payment was received. Click on 'Create a follow up task':
- Input your task details:
- Task Title: enter a task name.
- Details (Optional): enter any notes or details about your task.
- Due Date: select the date the task is due.
- Set Time (Optional): select the time the task is due, if necessary,
- Assign To: an Administrator has the option to assign the task to another user. By default, the person creating the task is assigned to the task.
- Click Preview
- Review what was discussed with your customer and the details of the follow up task, if it has been scheduled
- Click Save
- Navigate to the Promises List view the promise.