
PayThem by Draycir enables you to get paid faster by accepting invoice payments by credit cards and bank transfers via our 'Pay Now' button on outgoing emails. This streamlines the process of collecting payments securely and swiftly, enabling your customers to settle outstanding invoices in just a few clicks.
PayThem works with payment providers such as Stripe, Opayo (previously SagePay), TranSafe, Nuvei, and Total Processing, making payment collection hassle-free.
Before you start
Before you can link Credit Hound Cloud to PayThem, you'll need:
- Administrator access to Company Settings in Credit Hound Cloud
- An existing PayThem subscription
Set up PayThem for your Credit Hound Cloud company
To start accepting payments through PayThem, you'll need to link your Credit Hound Cloud company to a PayThem company.
- In Credit Hound Cloud, go to Company Settings.
- Open the PayThem Settings tab.
What you see on the tab depends on whether you already have PayThem companies set up. Follow the steps for your situation below.
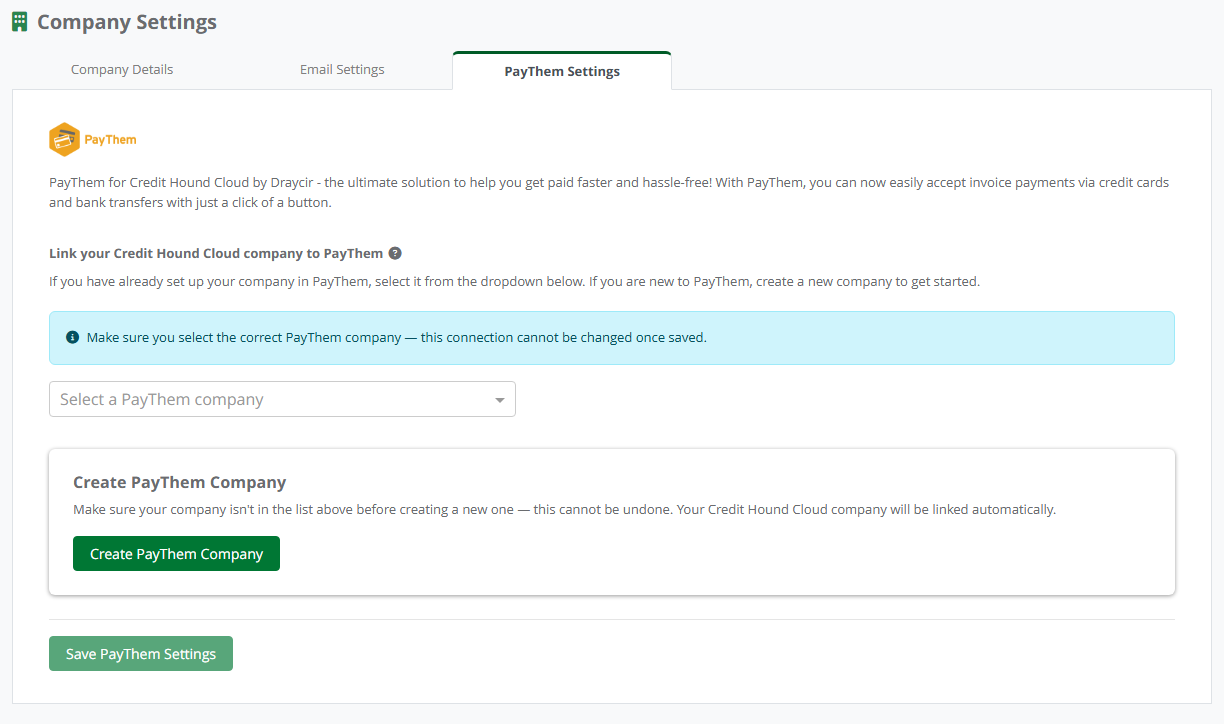
If you're new to PayThem
If you don't have any PayThem companies set up yet, Credit Hound Cloud will show a Create PayThem Company section.
- Click Create PayThem company.
- Credit Hound Cloud will set up your PayThem company and link it automatically.
If you already use PayThem
If you have PayThem companies set up (for example, through using the Draycir Spindle Document Distribution or directly via the PayThem Admin Portal), Credit Hound Cloud will show them in a dropdown along with the option to create a new one.
- Check the dropdown for your existing PayThem company.
- If you find it, select it and click Save PayThem Settings.
- If your company isn't in the list, click Create PayThem company to set up a new one.
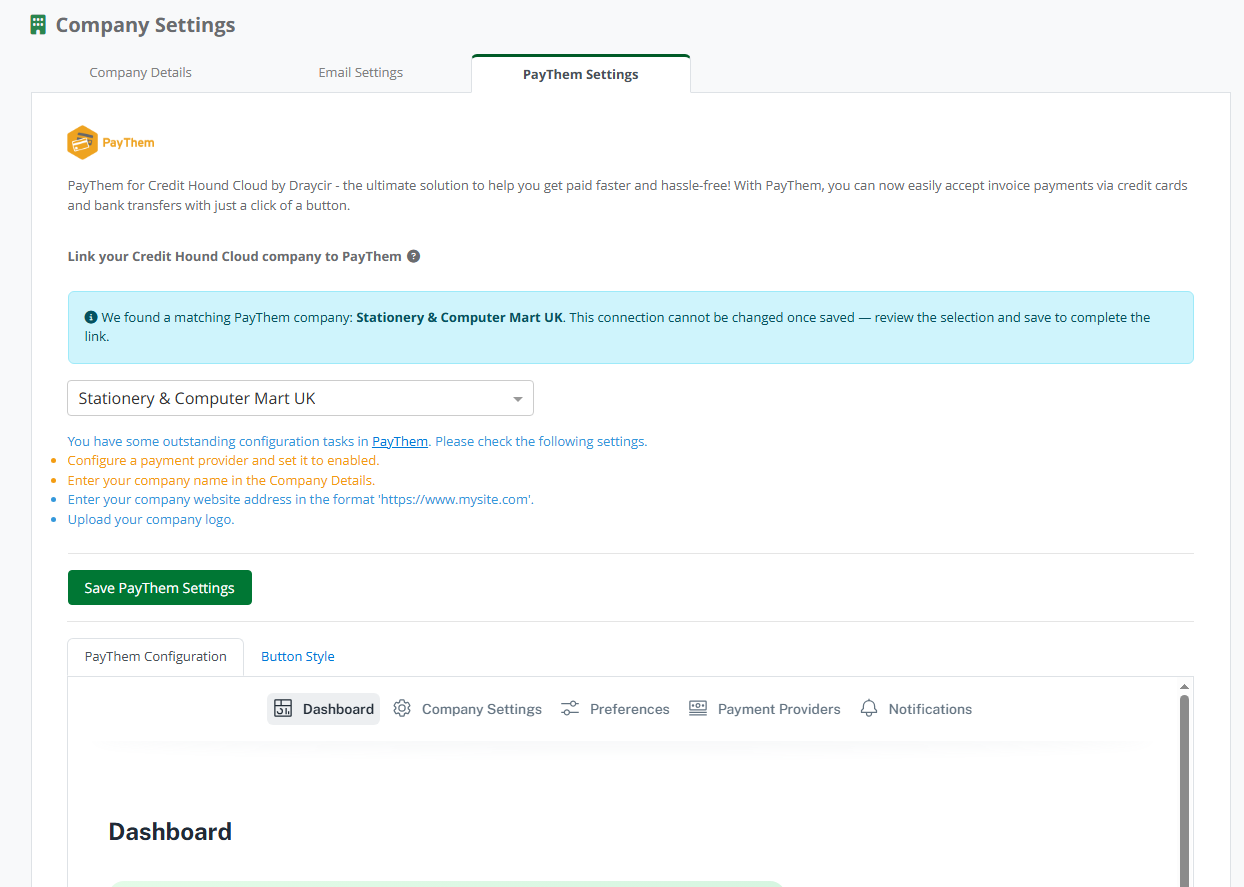
If a match is found automatically
If you already have PayThem companies set up, Credit Hound Cloud will try to find one that matches your Credit Hound Cloud company. When a match is found, it will be pre-selected for you.
- Review the matched PayThem company shown in the dropdown.
- If correct, click Save PayThem Settings to complete the link.
After your company is linked
Once your Credit Hound Cloud company is linked to a PayThem company, the link is permanent. The dropdown and Save PayThem Settings button will be disabled, and the linked PayThem company name will be shown.
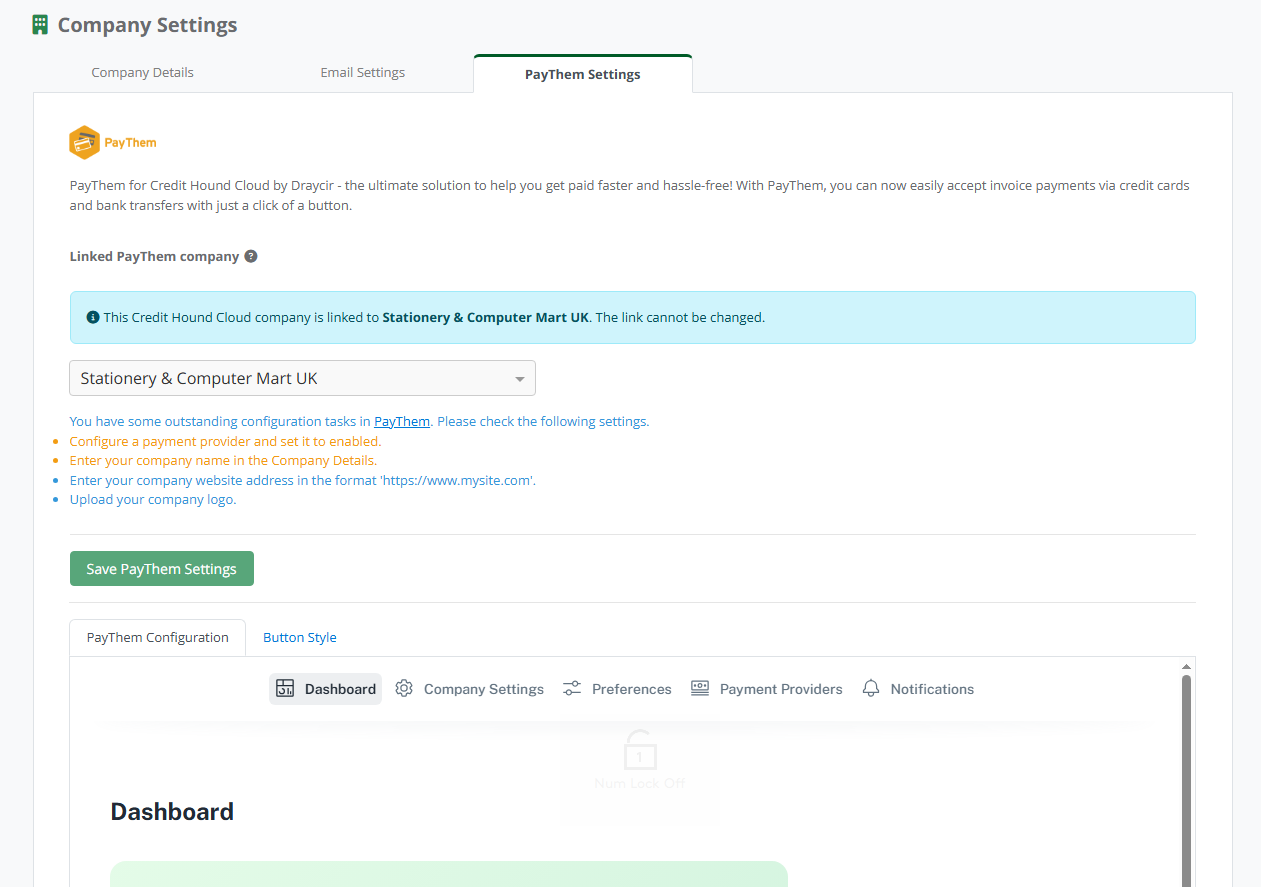
Note: If the wrong PayThem company has been linked, please contact support for assistance.
If your linked PayThem company has been deleted
If the PayThem company that Credit Hound Cloud was linked to has been deleted from the PayThem Admin Portal, you'll see a message on the PayThem Settings tab explaining that the link is broken. The dropdown and Save PayThem Settings button will be disabled.

Because the link to PayThem cannot be changed once saved, this situation needs to be resolved with assistance from Draycir support.
Configuration Tasks
If you have not completed the setup for PayThem, any outstanding configuration tasks will be listed on the PayThem Settings page. These are split into mandatory and recommended settings, all of which need to be completed before you can use PayThem with Credit Hound Cloud.
You can complete these tasks without leaving Credit Hound Cloud - the PayThem Admin Portal is embedded under the PayThem Configuration tab, giving you access to PayThem's Dashboard, Company Settings, Preferences, Payment Providers, and Notifications directly from within Credit Hound Cloud.
.png)
The configuration tasks listed are:
Mandatory
- Configure Payment Provider
Draycir PayThem supports a number of different Payment Providers. You need to configure a payment provider before you can start accepting payments.
- Company Details Incomplete
Details on your company are missing and need to be completed.
Recommended
- Add Website Details
Add your company website details to display on the payments page your customers receive. Enter your company website address in the format 'https://www.mysite.com'.
- Upload a Company Logo
Upload a logo to display on the payments page your customers receive.
PayThem Button Style
You can choose from a range of PayThem button styles to better match what the user can see when directed to our secure PayThem payment page that lists the invoices selected that are due for payment.
If you're using Spindle Document Distribution alongside Credit Hound Cloud, you can upload original invoice documents - these will then be available for your customers to view via the Pay Now button, helping them confirm invoice details before making a payment.
To give you more control over how these buttons appear, you can choose the text and colour of the PayThem button added to your chase emails. Whether you want customers to Pay Now, View Invoices, or explore Payment Options, you can choose the style that best matches your tone and encourages faster payments.
To select a PayThem button style:
- Go to Company Settings.
- Open the PayThem Settings tab.
- Select the Button Style section.
- Use the dropdown menu to choose your preferred button style.
- A preview of the selected button will be displayed below.
 PayThem Button Style
Button Style Options
You can choose from the following button styles in different colours:
- Pay Now
- Payment options
- Pay and view invoices
- Pay or view invoices
- View documents
- View invoices
Where the Button Is Used
The selected PayThem button style will be used in:
- Email Templates (e.g. in Collection Paths)
- Manual Emails (when sending emails directly to customers)
When you change the PayThem button style, it automatically updates the button used in all existing Email Templates where a PayThem button is currently included.
A confirmation dialog will appear when saving a new button style, prompting you to confirm.
Set up a PayThem company in the Admin Portal
Most users will create their PayThem company directly from Credit Hound Cloud as part of the steps above. If you need to set up a PayThem company in the PayThem Admin Portal instead - for example, to configure additional options before linking - you can do so manually.
- Log in to the PayThem Admin Portal
- Click on Settings from the menu in the bottom left-hand corner of the screen.
- From the menu select Companies.
- When the page appears, click on the Add Company button.
- Enter the name of the company.
- Enter the company short name and description (optional).
- Select the correct ERP system from the dropdown menu.
- Enter the Host Id.
- If you wish to copy settings from an existing company, click the Copy SettingsFrom dropdown to select the company.
- Click Add to finish.
Once added, return to Credit Hound Cloud and follow the steps under If you already use PayThem above to link the company.
After connecting to PayThem, you can configure your Email Templates and manual emails with a Pay Now button. By adding this Pay Now button to your outbound emails, your customers can receive a payment request by clicking on this button to be redirected to a secure payment page.