
Step-by-step Guide to Connect Sage Intacct to Credit Hound
To start using Credit Hound with Sage Intacct, you need to configure Sage Intacct which then allows you to synchronize your customers, contacts and transactions with Credit Hound.
Configure Sage Intacct Prerequisites
The following steps detail the prerequisites that you must configure in Sage Intacct prior to connecting your company with Credit Hound.
Subscribe to Web Services
Before you can connect Credit Hound to Sage Intacct, you must allow third party access to your data via enabling Web Services. To do this:
- Select Company from the menu
- Navigate to the Admin tab and select Subscriptions
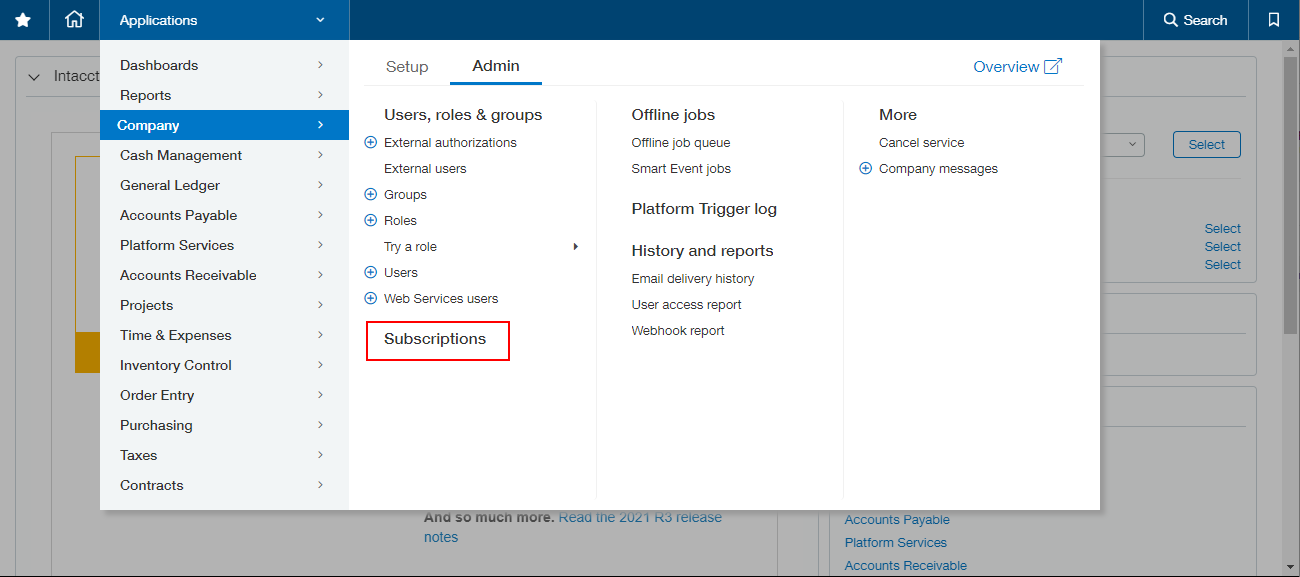
- Find Web Services and enable the toggle to Subscribe
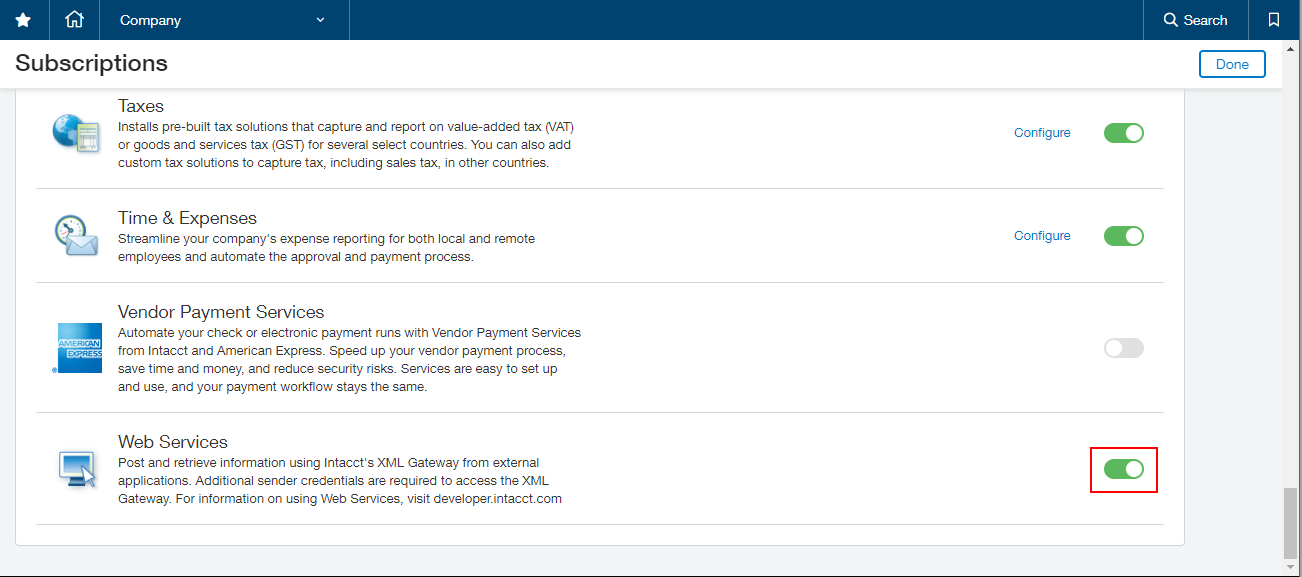 Enable Web Services Authorize access to the Draycir Web Services Account
To allow Credit Hound to send API requests to your Sage Intacct account you must authorize access for the Draycir Web Services account.
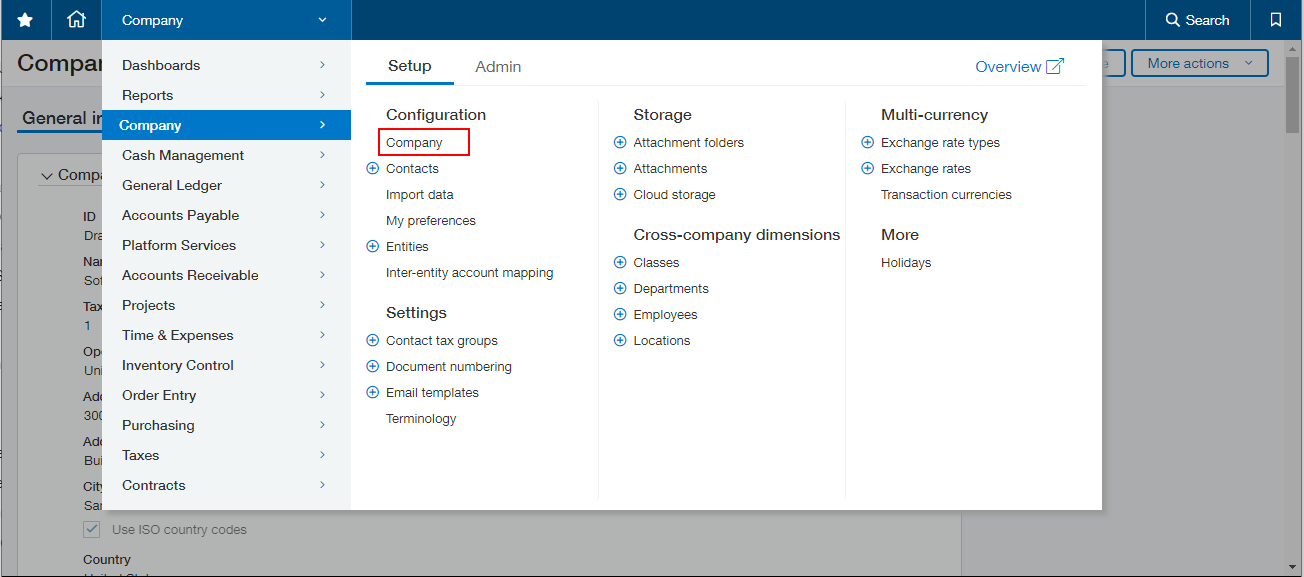
- On the Home page, select Company from the menu
- Under the Setup tab > Configuration > select Company
 Navigate to Company Setup
 - Click the Security tab
- Click the Edit button located in the top-right
- Go to the section labelled Web Services authorizations and click the Add button
 Web services authorizations
- Add the Sender ID DraycirMPP
- Click Save
Create the Web Service User
The Web Service user is strictly for the use of the integration of Intacct with Credit Hound.
The User ID is important and will be used later. The email address is where the confirmation email from Intacct will be sent, so please ensure you enter a correct email address.
- Select Company from the menu
- Under the Admin tab > select Web Services users
- Click Add
 Create Web Services user Under User Information, input values for the required fields. For example:
- User ID
- XML_Draycir
- Last name
- Hound
- First name
- Credit
- Email address
- Use the email address of the person managing the Credit Hound account for the sync.
- User Type
- Ensure this is a Business User
- Admin privileges
- Select Limited
After creating the Web Services user, a confirmation email will be sent from Sage Intacct containing a temporary password. Make a note of the User ID, Company and Password as they are needed for connecting Credit Hound to Sage Intacct.
Assigning permissions to the Web Services user
The steps to assign permissions to the Web Services user vary slightly depending on whether your security is defined as either as Role-based or User-based.
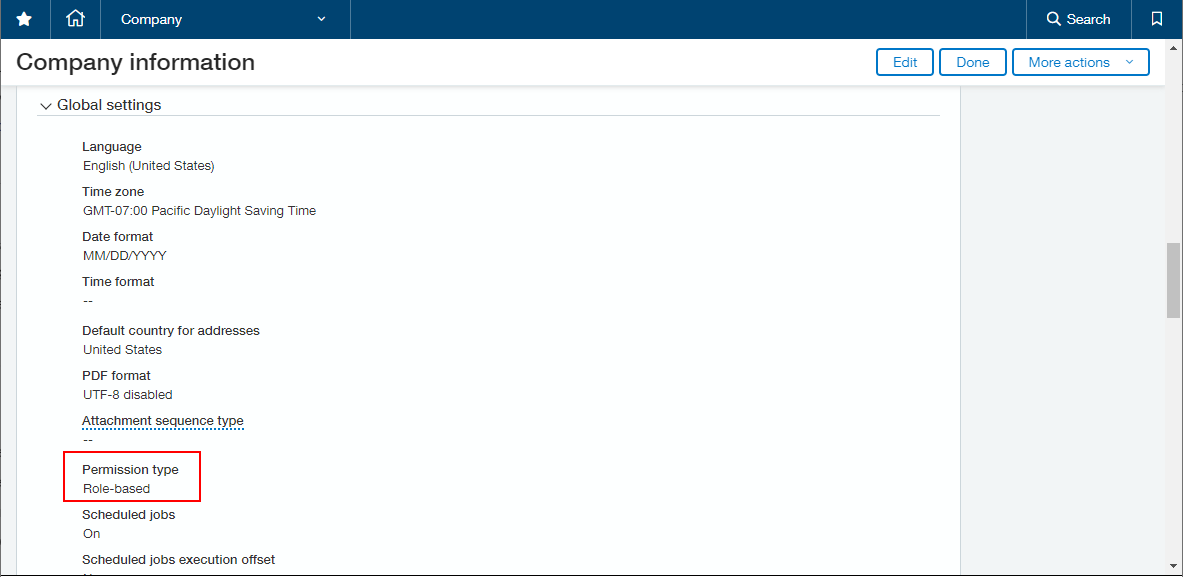
Determining permissions type
- On the Home page, select Company from the menu
- Under the Setup tab > Configuration > select Company
- Under the Global settings section, check the Permission type
Role-based security
If you are using Role-based security, you can create a new User role with the required permissions. Follow the steps below.
Create a new User Role
- Select Company from the menu
- Under the Admin tab select Roles
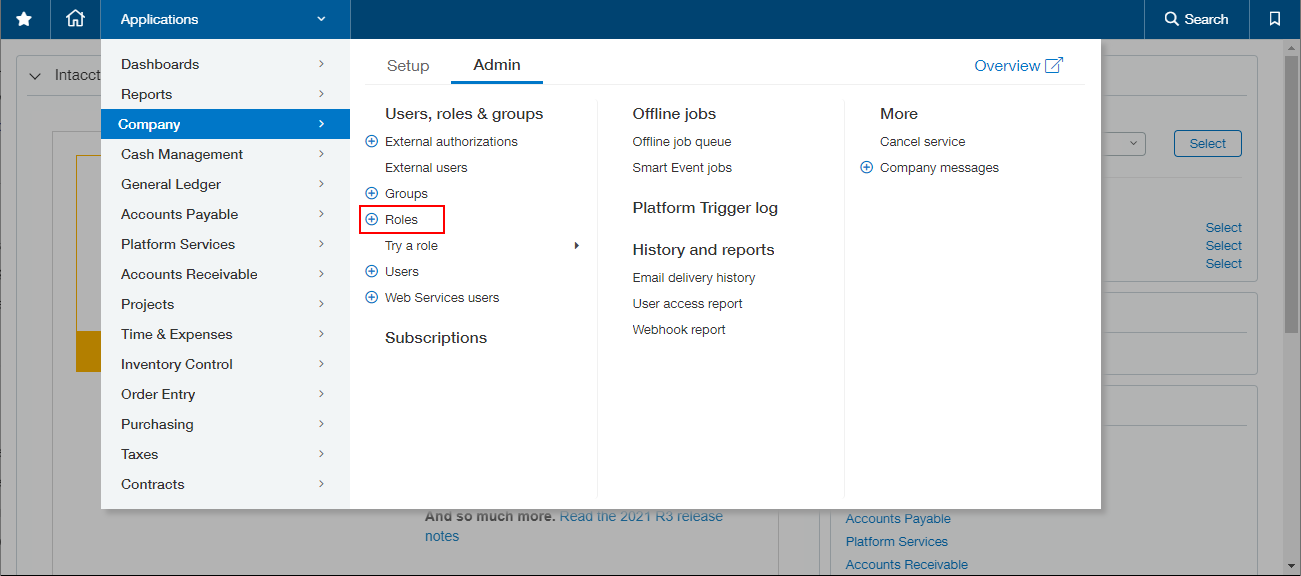 Navigate to Roles
 - Click the Add button in the top-right
- Input a Name such as Credit Hound
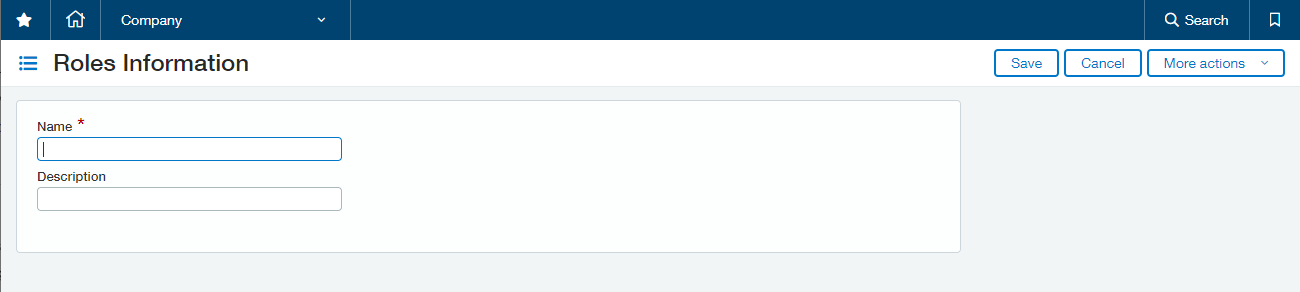
- Click Save
Assign permissions to the role
Once you've added the role, you need to configure what areas of Sage Intacct to grant access to.
- Click on Subscriptions next to the new Role
- Click on the necessary Permissions for each applicable module:
- Administration
- For Company Info, select the View check box.
- Company
- For Entities, select the View check box.
- For Transaction Currencies, select the View check box.
- Accounts Receivable
- For Manage Payments, select the View check box.
- For Customers, select the View check box.
- For Invoices, select the View check box.
- For Adjustments, select the View check box.
- For AR Terms, select the View check box.
- Platform Services
- For Custom Reports, select the List and View check box.
- For Interactive Custom Reports, select the List and View check box.
- Click Save
 Role Subscriptions
Assign the new role to the Credit Hound user
Role SubscriptionsAssign the new role to the Credit Hound user
- Select Company from the menu
- Under the Admin tab select Web Services users
- Click Edit next to the User just created
- Click on the Roles information tab and assign this new user the role that you created in the prior step
- Click Save
- Ignore any warning that there will be a charge for creating the User
User-based security
Assign permissions to the Web Services user
If you are using using User-based security, you can follow the steps below to assign the necessary permissions to the Web Services user:
- Go to the Company > Web Services Users
- Select the Web Services user you just created and click on Subscriptions
- Click on Permissions and assign the required permissions for each applicable module:
- Administration
- For Company Info, select the View check box.
- Company
- For Entities, select the List and View check boxes.
- For Transaction Currencies, select the List and View check boxes.
- Accounts Receivable
- For Manage Payments, select the List and View check boxes.
- For Customers, select the List and View check boxes.
- For Invoices, select the List and View check boxes.
- For Adjustments, select the List and View check boxes.
- For Deposits, select the List and View check boxes.
- For AR Terms, select the List and View check boxes.
- Platform Services
- For Custom Reports, select the List and View check box.
- For Interactive Custom Reports, select the List and View check box.
- After you've added all the required permissions, click Save.
Connecting Sage Intacct to Credit Hound
You can follow these step-by-step instructions to help you get up and running:
- Logon to Credit Hound at https://my.credithoundcloud.com
- If this is your first time setting up Credit Hound, you will be presented with the Welcome to Credit Hound screen where you can select your time zone from the drop-down list
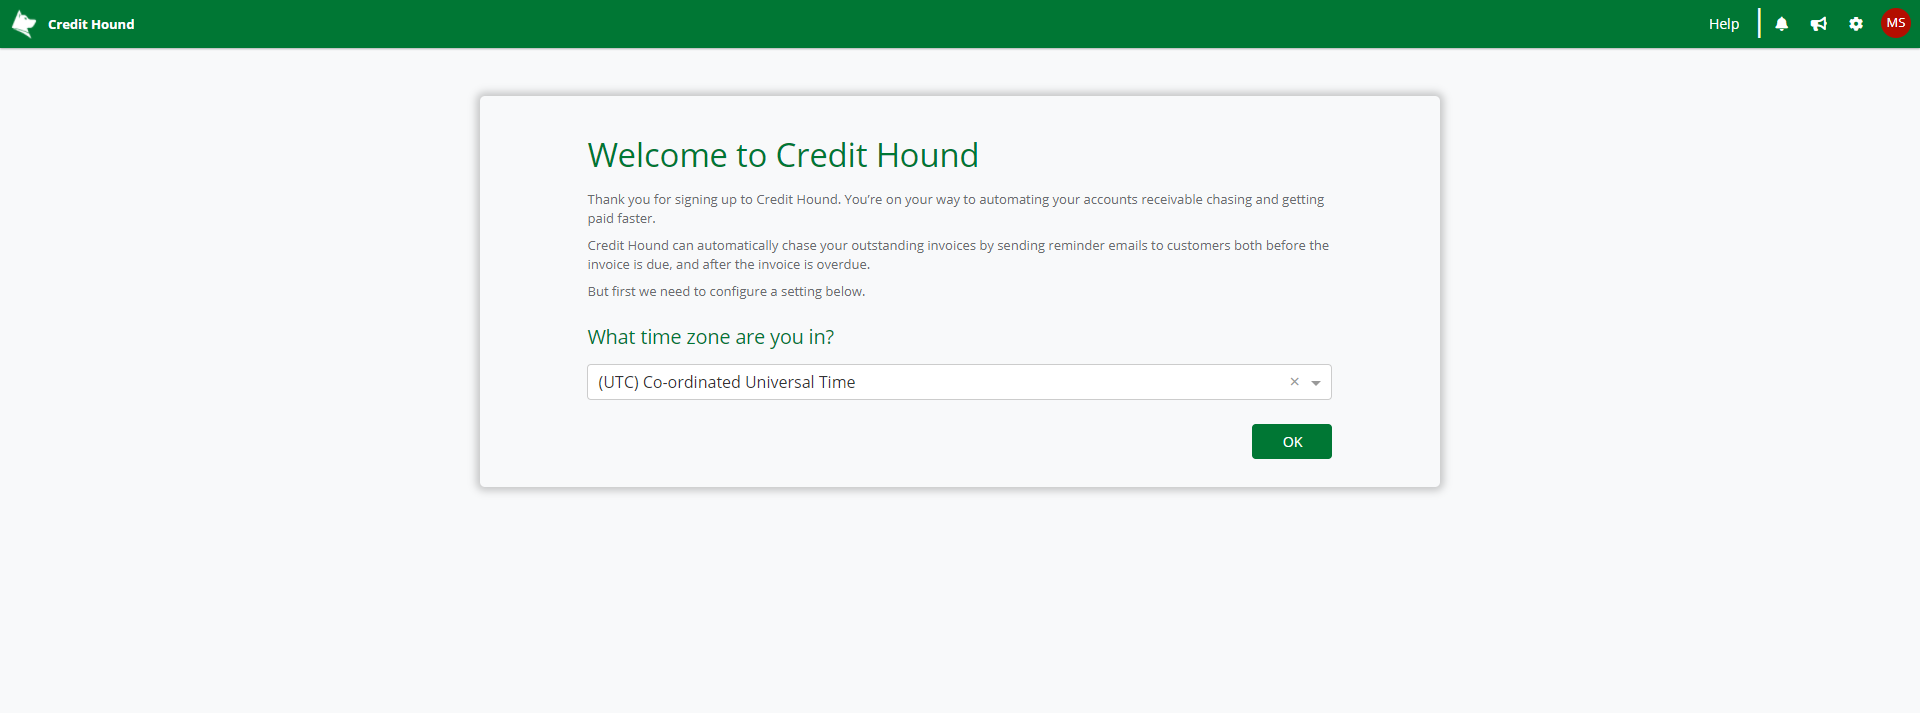
- Click the OK button
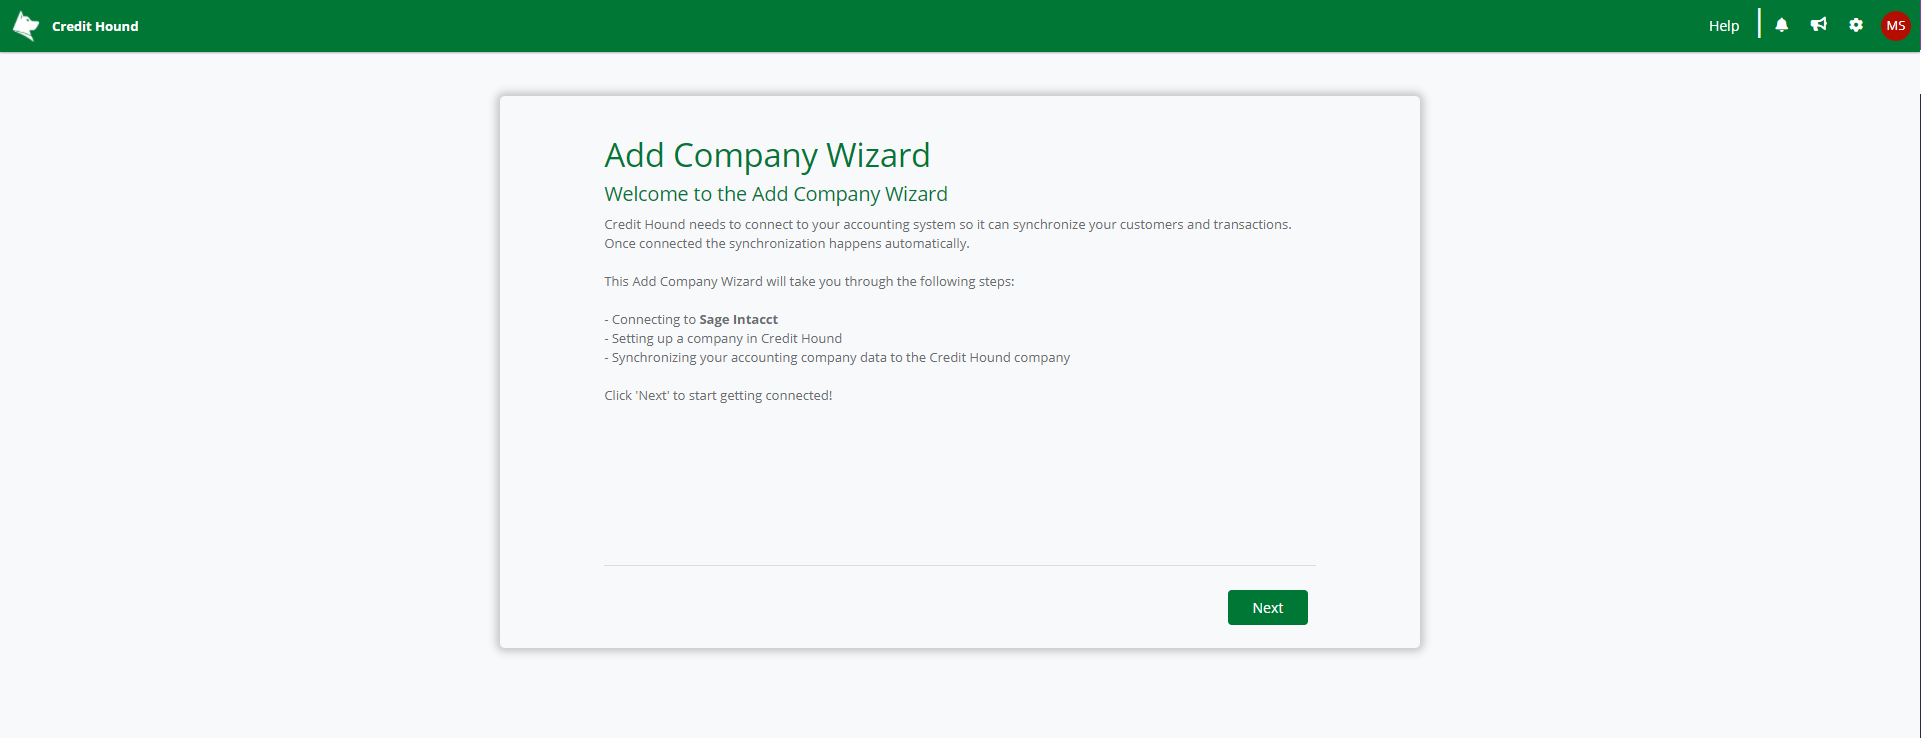
- You will now be presented with the Add Company Wizard screen. This wizard will take you through connecting your accounting data to Credit Hound.
Enter your credentials into the Add Company Wizard of Credit Hound
- Enter the details you received in the prior email into the Credit Hound Add Company Wizard for Sage Intacct.
- Company ID
- User ID: Use the Web Services User
- Password: Check the email associated to the Web Services user. A password was emailed to this address when the Web Services user was created
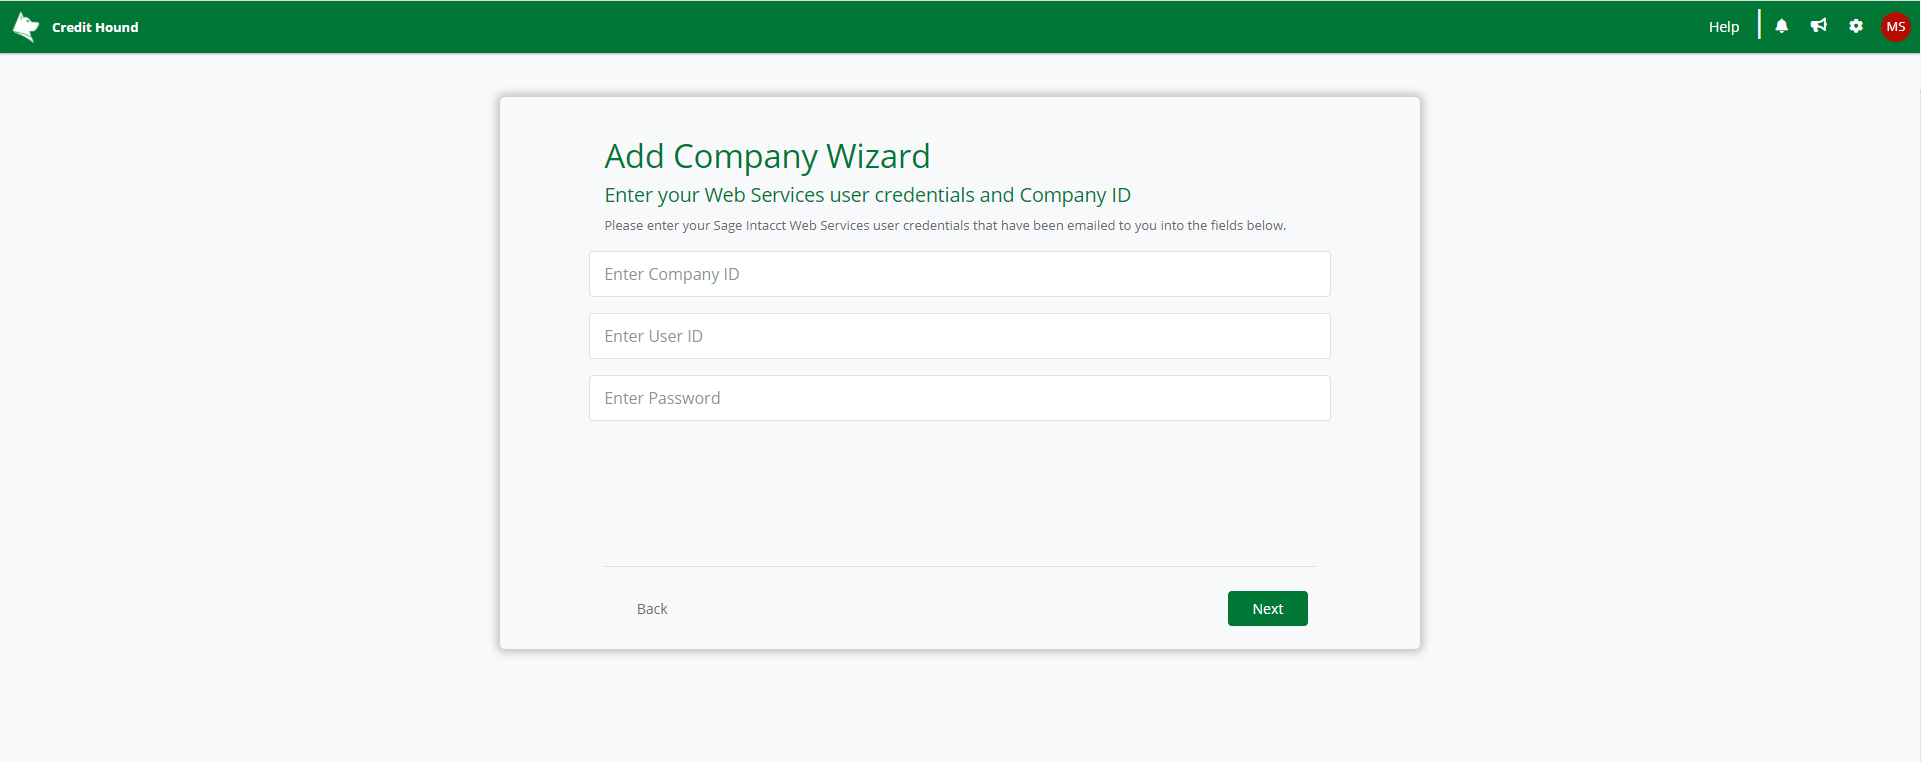
- Click Next
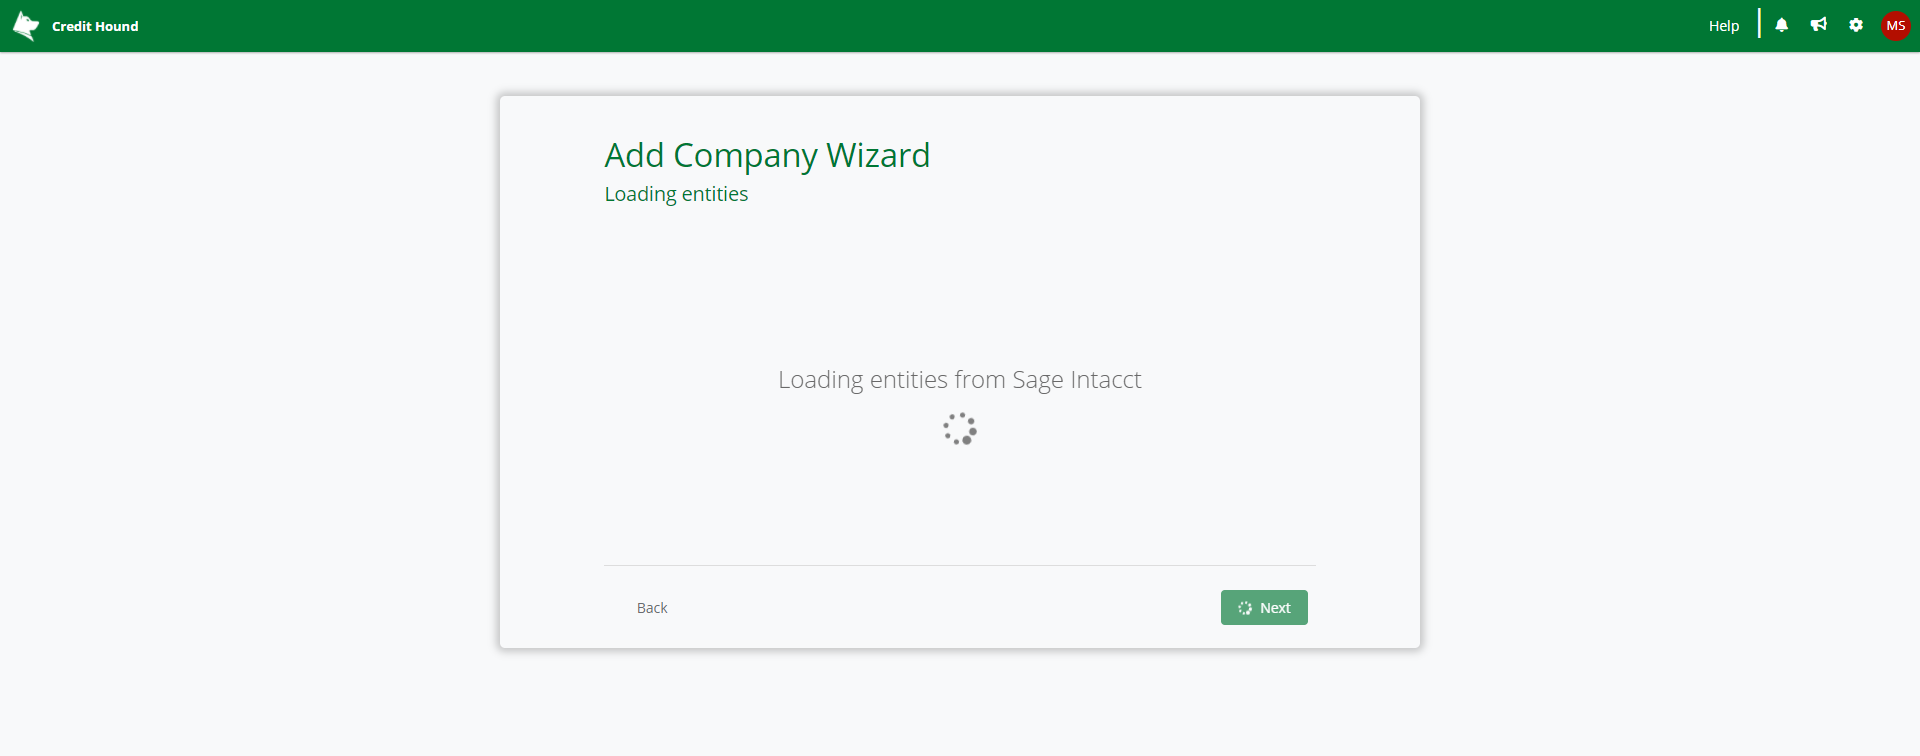
- Credit Hound will begin to load your entities

- Select an entity that you want to link with Credit Hound Cloud
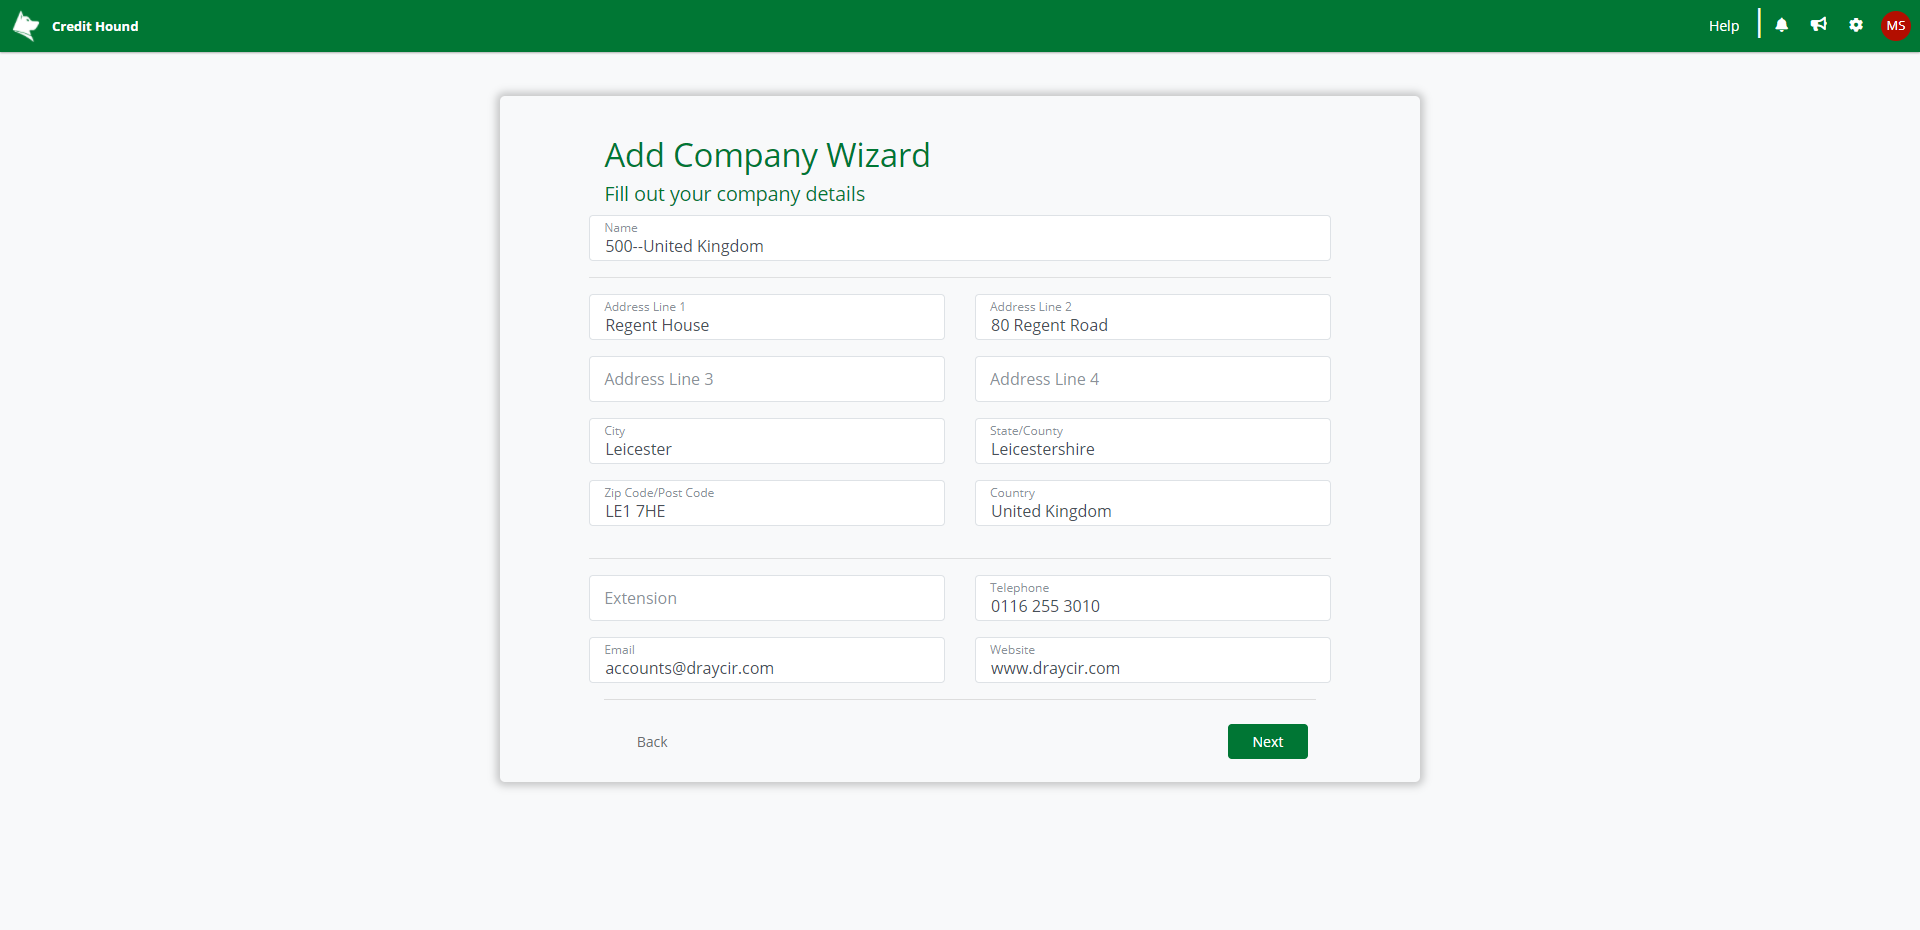
- Once you have selected a company (or if you only have one company), this following screen shows the company details we will register with Credit Hound. By default, they are taken from the company you just selected from Sage Intacct. You can change any details here or fill in missing fields such as your email address, company website and telephone
- Click Next
Congratulations, the Add Company Wizard is complete. You will be taken into Credit Hound and the data will begin to synchronize.
It may take some time for your data to synchronize. Give it a few moments and refresh the screen.